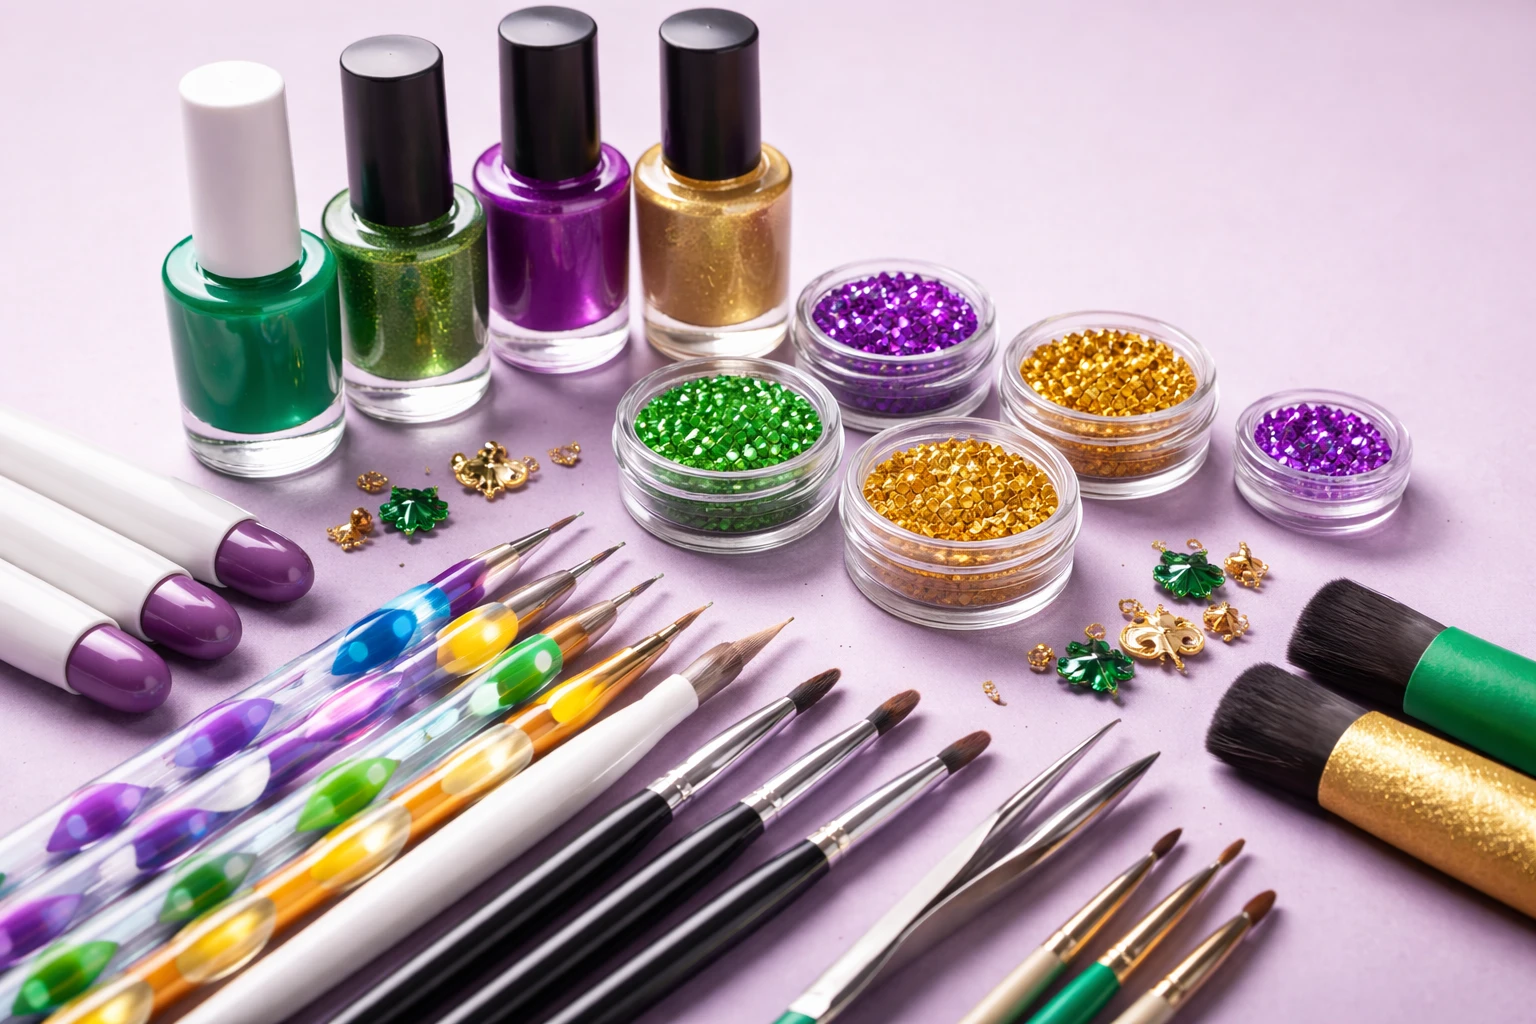
Mardi Gras nail art is not subtle. It’s bold. Layered. Confident. And if you want results that look intentional instead of chaotic, the tools needed for Mardi Gras nail art matter just as much as color choice. I’ve learned this the hard way. The difference between a crisp, festival-ready set and one that feels unfinished almost always comes down to the tools in your hand.
Mardi Gras designs push boundaries. Metallic finishes. Beads. Masks. Sharp color divisions. You can’t fake precision when you’re working with that much visual energy. The right tools give you control. They save time. They also keep your work looking polished even when the design itself is loud and that balance is everything. This guide breaks down the exact tools needed for Mardi Gras nail art, why each one matters, and how to use them effectively whether you’re a beginner or working at a professional level.
Why Tools Matter More for Mardi Gras Nail Art
Mardi Gras nail art is layered by nature. You’re stacking color, texture, shine, and detail all on one small surface. Without the right tools, that layering turns messy fast.
There’s a surprising parallel here to phenomenology, which explores how structure shapes perception. In nail art, structure is visual. The wrong tool disrupts how the design is perceived, no matter how creative the concept is. This isn’t about buying everything. It’s about choosing tools that help you execute clean lines, secure embellishments, and maintain structure as the design builds.
Core Nail Prep Tools: The Non-Negotiables
Before color. Before glitter. Before anything festive. Prep.
A flawless design always starts with a stable base, and that stability also affects hygiene and safety. Improper prep increases the risk of lifting, moisture trapping, and bacterial growth, which the Centers for Disease Control and Prevention highlights as a common issue in cosmetic applications involving repeated skin contact.
Nail Files and Buffers
Every Mardi Gras set benefits from intentional shaping. Long or short, square or almond, the shape must support heavy detail.
What to keep on hand:
- 180-grit file for shaping
- 240-grit file for refining edges
- Soft buffer for smoothing surface texture
A smooth surface helps metallics apply evenly and prevents lifting when layers stack up.
Cuticle Pushers and Nippers
Clean cuticles give designs room to breathe. They also make nail art look intentional instead of crowded. Use pushers gently. Trim only dead skin. Over-cutting ruins the frame of the nail and shortens wear time.
Nail Cleanser and Lint-Free Wipes
This step is small but powerful. Oils and dust sabotage adhesion. Wipe every nail thoroughly before base coat. Especially if you’re planning rhinestones or chrome.
Base Application Tools That Set the Stage
Base Coats and Top Coats
Mardi Gras nail art demands durability.
You’ll want:
- A strong base coat that supports layering
- A glossy top coat for maximum shine
- A no-wipe top coat if you plan on chrome or foil
Gloss enhances metallic pigments. Matte works beautifully for contrast panels. Choose intentionally.
UV or LED Nail Lamp
If gel polish or builder gel is part of your design, a lamp isn’t optional. Go with a lamp that cures evenly across all fingers. Inconsistent curing leads to smudging, shifting embellishments, and premature wear.
Brushes That Make or Break the Design
Brushes do the heavy lifting in Mardi Gras nail art. This is where most beginners struggle and where professionals quietly excel.
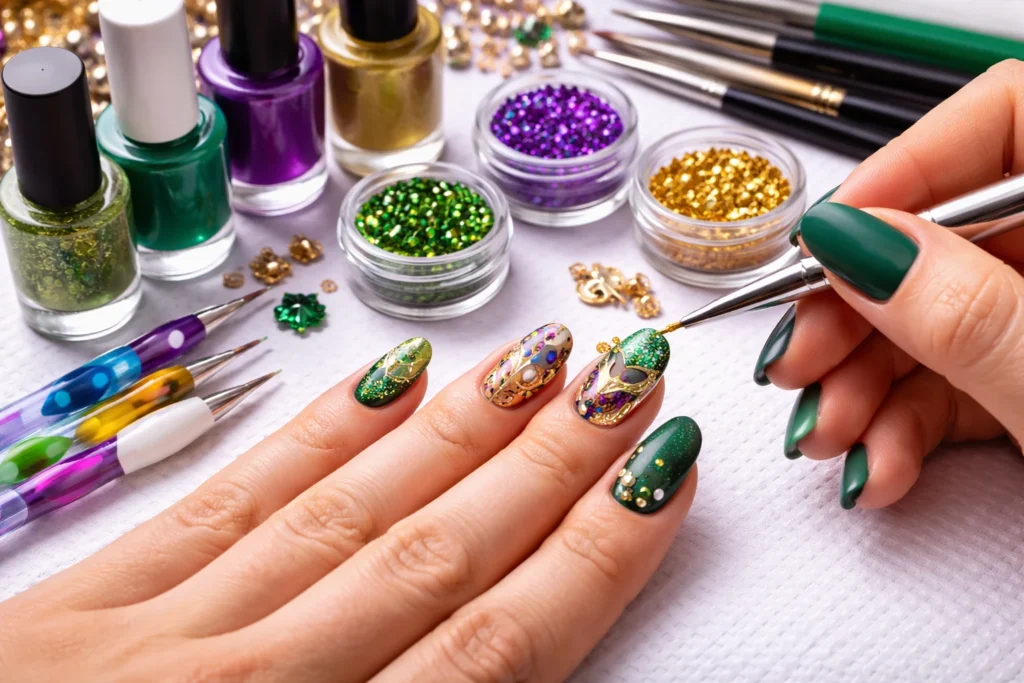
Detail Brushes
Fine liner brushes create:
- Bead outlines
- Mask contours
- Delicate scrollwork
If your lines shake, it’s not your hand. It’s usually the brush.
Striping Brushes
Striping brushes are essential for clean color separation. Mardi Gras palettes are bold, and sloppy edges ruin impact.
Use striping brushes for:
- Harlequin patterns
- Color-blocked sections
- Clean metallic borders
Flat and Angled Brushes
Flat brushes help pack color evenly. Angled brushes help guide it exactly where it needs to go. They’re especially useful when layering shimmer over darker bases.
Dotting and Precision Tools for Detail Work
Dotting tools are quiet heroes in the list of tools needed for Mardi Gras nail art.
Small dots create delicate bead chains. Larger dots add focal points. Layering dots builds dimension without bulk. Silicone tools move embellishments without scratching polish. They’re also excellent for shaping gel accents, especially when working with raised elements.
Specialty Tools for Mardi Gras Embellishments
Mardi Gras designs often feature beads, rhinestones, and studs. These tools help you place them with confidence.
Wax pens lift stones cleanly and place them exactly where intended. Tweezers remain essential for micro-studs, decals, and thin striping elements where grip matters more than adhesion.
Tools for Metallic and Chrome Effects
Metallics are a Mardi Gras staple. But without the right tools, they look patchy. Sponges apply chrome powders evenly. Burnishers lock them in. This combination is what creates reflective, mirror-like finishes instead of dull shimmer.
Foil, Transfer, and Stamping Tools
Foils and stamps add complexity without freehand work. Foil applicators help prevent wrinkling, while stamping plates allow repeatable motifs like masks and geometric accents with consistent alignment.
Tools for Texture and 3D Nail Art
Builder gel and acrylic tools allow you to sculpt raised beads, borders, and layered accents without excessive bulk. Embossing tools add texture that catches light and gives Mardi Gras designs their signature depth.
Cleanup and Refinement Tools
Cleanup brushes sharpen edges and correct mistakes without redoing the entire nail. Precision scissors allow clean trimming of decals, foils, and striping tape so nothing looks rushed or uneven.
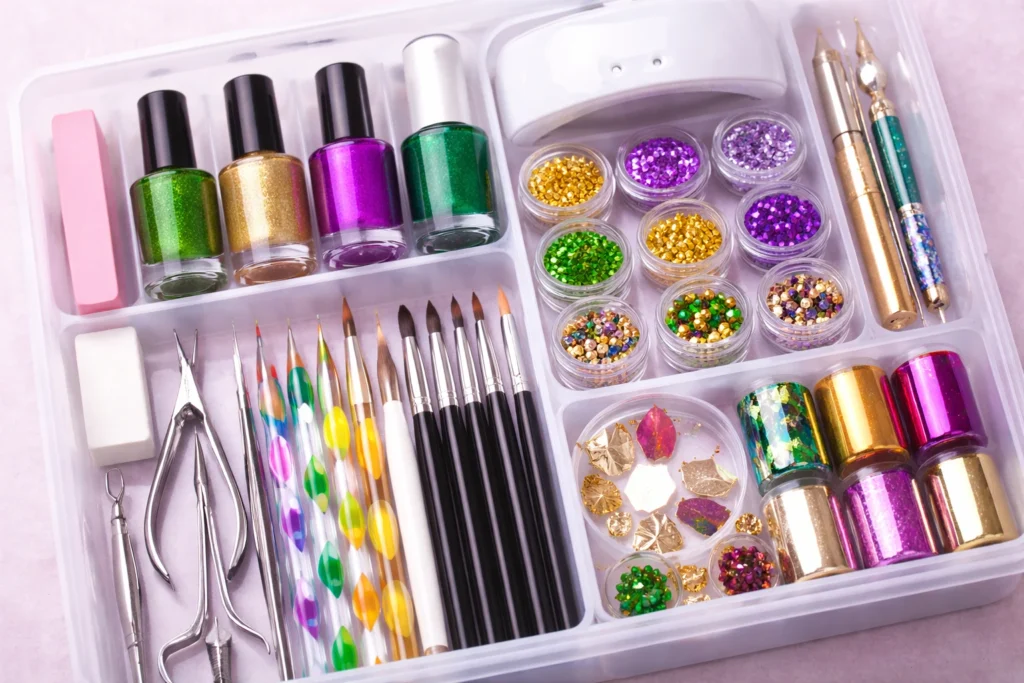
Organization Tools That Save Time and Sanity
Brush holders protect bristles. Mixing palettes keep colors consistent across all nails in a set. Organization isn’t glamorous, but it directly impacts execution quality.
Beginner vs Professional Tool Kits
Beginners should focus on prep tools, a few quality brushes, dotting tools, and a strong top coat. Professionals expand into builder gels, advanced embellishment tools, and specialized chrome and foil applicators. Quality matters more than quantity.
Common Mistakes Caused by the Wrong Tools
Using the wrong tools leads to uneven lines, poor adhesion, excess bulk, and short wear time.
Most skill issues are actually tool issues in disguise.
Final Thoughts: Build Intentionally, Create Confidently
The tools needed for Mardi Gras nail art aren’t about excess. They’re about control. When tools are chosen intentionally, designs feel balanced, confident, and visually powerful. With the right setup, creativity flows faster and results last longer. That’s when Mardi Gras nail art stops feeling chaotic and starts looking truly celebratory.
FAQs
Core prep tools, quality brushes, dotting tools, and a strong top coat form the foundation for most Mardi Gras nail designs.
No, beginners can start with basic prep tools, a few detail brushes, and dotting tools, then upgrade as skills improve.
They allow precise lines and clean edges, which are critical for bold color blocking and intricate patterns.
Dotting tools are recommended because they create consistent bead and accent sizes that are hard to replicate with substitutes.
Sponge applicators and nail art burnishers help distribute pigment evenly and enhance shine.
Wax pens and precision tweezers allow accurate placement without smudging or shifting embellishments.
A lamp is required if gel polish, builder gel, or chrome powders are part of the design.
Proper prep tools, nail cleanser, and a high-quality base coat reduce lifting and improve durability.
Yes, stamping tools help create repeatable motifs like masks and geometric accents with clean consistency.
Brush cases, tool holders, and palettes help protect tools and keep workflows efficient.