Gel nails look flawless. Glossy. Durable. Practically chip-proof. But when it’s time to take them off, things can go very wrong—very fast.
I’ve seen it happen. Peeling, scraping, forcing the polish off in frustration. It feels quick in the moment. But your nails? They pay the price.
If you’re wondering how to remove gel nails safely without damage, you’re in the right place. This guide walks you through the exact process, step by step, with practical tips you can actually use. No fluff. No shortcuts that wreck your nails.
Let’s get into it.
What Are Gel Nails and Why Proper Removal Matters
Gel nails aren’t like regular polish. They’re cured under UV or LED light, forming a tough, bonded layer over your natural nail.
That’s why they last. And that’s also why they don’t just “wipe off.”
Interestingly, the curing process involves a chemical reaction known as polymerization, where liquid gel hardens into a durable coating. This is what makes gel polish so resistant—and why removal requires care.
Here’s the key issue:
When you remove gel nails incorrectly, you don’t just remove polish—you often remove layers of your natural nail.
That leads to:
- Thin, weak nails
- Peeling and splitting
- Sensitivity and discomfort
Learning how to remove gel nails safely without damage isn’t optional. It’s essential if you want to keep your nails healthy long-term.
Signs It’s Time to Remove Your Gel Nails
Timing matters more than most people think.
Wait too long, and your nails become more vulnerable. Remove too early, and you risk unnecessary damage.
Watch for these signs:
- Visible lifting at the edges
- Noticeable regrowth gap near the cuticle
- Dull or scratched finish
- Snagging on hair or fabric
- Mild discomfort or pressure
If you notice any of these, it’s time.
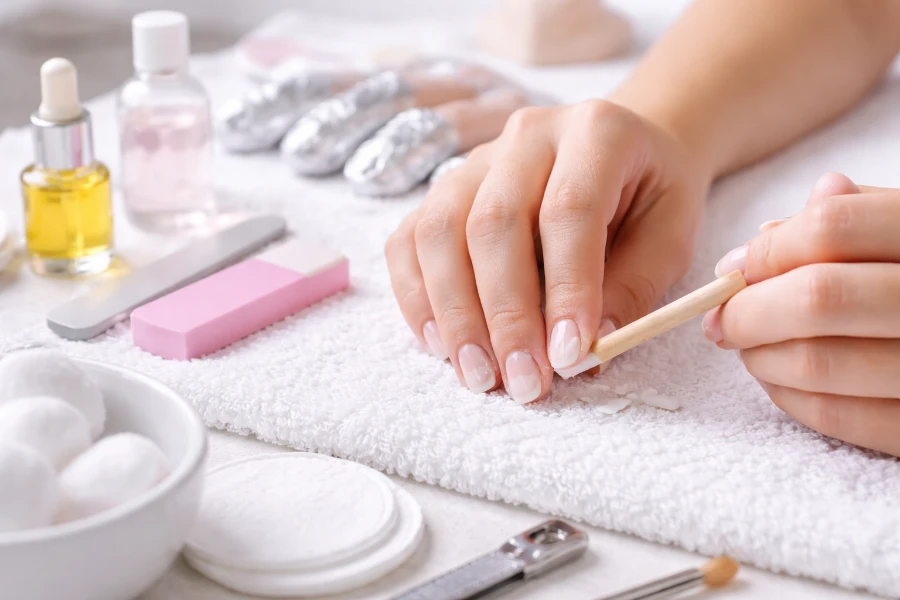
Tools and Materials You’ll Need
Preparation makes everything smoother. Literally.
Here’s what you’ll need:
- 100% pure acetone
- Cotton balls or pads
- Aluminum foil or nail clips
- Nail file (coarse + fine grit)
- Cuticle pusher or orangewood stick
- Nail buffer
- Cuticle oil
- Hand cream
Quick Setup Table
| Item | Purpose |
| Nail file | Breaks gel top coat seal |
| Acetone | Dissolves gel polish |
| Cotton + foil | Holds acetone in place |
| Cuticle pusher | Gently removes softened gel |
| Buffer | Smooths nail surface |
| Cuticle oil | Restores moisture |
Set everything within reach before you start. Trust me—once your nails are wrapped, you won’t want to hunt for supplies.
Step-by-Step Guide: How to Remove Gel Nails Safely Without Damage
This is where precision matters. Follow each step carefully.
Step 1: File the Top Coat
Start by gently filing the shiny top layer of your gel polish.
You don’t need to remove all the color. Just break the seal.
Why it matters:
The top coat acts like a barrier. Without removing it, acetone can’t penetrate effectively.
Tip: Use light pressure. You’re not sanding wood—you’re working on your nails.
Step 2: Soak Cotton in Acetone
Take a cotton ball or pad and soak it thoroughly in acetone.
Not damp. Saturated.
Place it directly on your nail so it fully covers the gel surface.
According to the U.S. Food and Drug Administration, acetone is commonly used in cosmetic products like nail polish removers and is considered safe when used as directed.
Step 3: Wrap Nails Securely
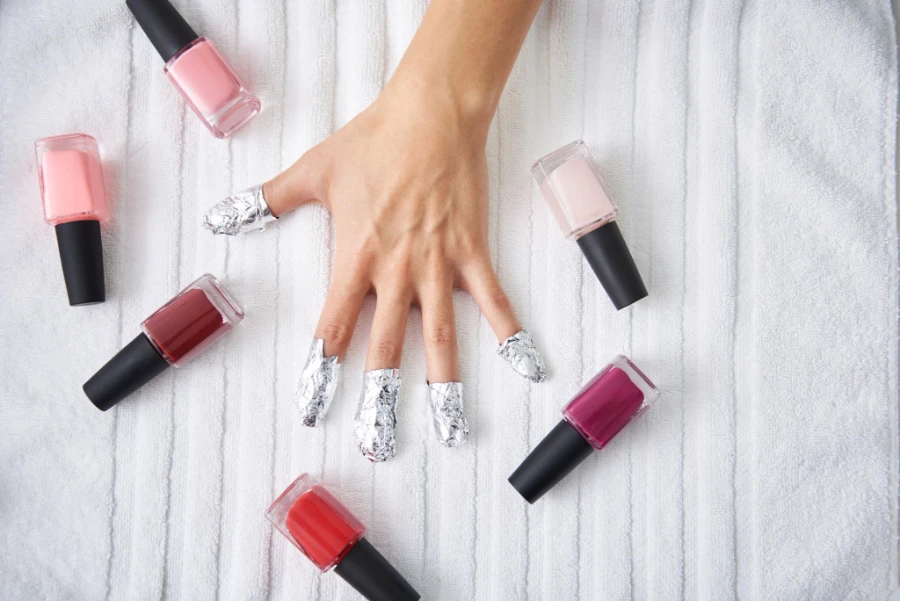
Wrap each fingertip with aluminum foil or use nail clips.
The goal is simple:
Keep the acetone in contact with your nail and prevent evaporation.
Pro tip:
Wrap tightly, but not uncomfortably. A snug seal speeds up the process.
Step 4: Wait Patiently
This is the hardest part for most people.
Wait 10–15 minutes. No peeking every two minutes.
Acetone needs time to break down the gel structure.
If your gel is thick or layered, you may need closer to 15–20 minutes.
Step 5: Gently Push Off the Gel
Unwrap one nail at a time.
Use a cuticle pusher to gently slide off the softened gel.
If it doesn’t come off easily—stop.
Do not force it.
Instead:
- Rewrap the nail
- Wait another 5 minutes
- Try again
This step defines whether you succeed in how to remove gel nails safely without damage.
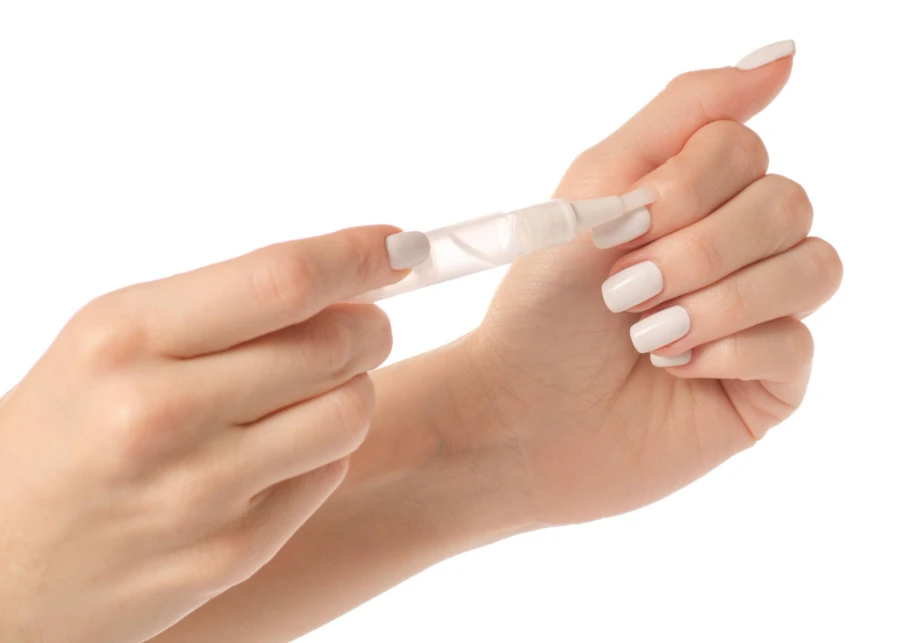
Step 6: Buff the Nail Surface
Once the gel is removed, you may see small residue patches.
Use a fine buffer to smooth the surface.
Keep it gentle. Over-buffing thins your nails.
Step 7: Hydrate and Nourish
Your nails just went through acetone exposure. They’re dehydrated.
Now is the time to restore moisture.
Apply:
- Cuticle oil
- Hand cream
Massage it in. Don’t rush this step.
Healthy nails depend on what you do after removal just as much as the removal itself.
Alternative Removal Methods (And When to Use Them)
Acetone is the most effective method. But there are alternatives.
Non-Acetone Removers
- Gentler on skin
- Slower and less effective on gel
- Best for sensitive users
Steam Removal Kits
- Use warm vapor to loosen gel
- Less drying than acetone
- Requires special equipment
Professional Salon Removal
- Ideal if your nails are already damaged
- Faster and more controlled
- Worth it for complex gel systems
If you’re unsure, choosing a professional is never a bad call.
Common Mistakes That Damage Your Nails
Let’s be blunt. Most nail damage comes from these avoidable mistakes.
Avoid These at All Costs:
- Peeling off gel polish
- Using sharp tools aggressively
- Skipping the soak time
- Over-filing your nails
- Ignoring hydration afterward
Peeling might feel satisfying. It’s also the fastest way to ruin your nails.
How to Protect Your Nails During and After Removal
Healthy nails aren’t just about removal—they’re about protection.
Best Practices:
- Use strengthening treatments weekly
- Apply cuticle oil daily
- Wear gloves during cleaning
- Avoid immediate reapplication of gel
Give your nails breathing room.
Aftercare Routine for Healthy Nails
Consistency wins here.
Daily Routine:
- Apply cuticle oil morning and night
- Use hand cream after washing hands
Weekly Routine:
- Light buffing
- Nail strengthener application
Recovery Timeline:
| Condition | Recovery Time |
| Mild dryness | 2–3 days |
| Slight peeling | 1–2 weeks |
| Significant thinning | 3–4 weeks |
Stick to this, and your nails bounce back faster than you expect.
Once your nails recover, you can experiment with styles like these Disney toe nails designs.
When to Visit a Professional
Sometimes DIY isn’t the right move.
Seek help if you notice:
- Persistent pain
- Nail discoloration
- Severe thinning
- Signs of infection
There’s no downside to getting expert care when your nails need it.
Pro Tips for Easier Future Removal
Here’s something most people overlook:
Removal starts with application.
Make Future Removal Easier By:
- Using high-quality base coats
- Avoiding over-curing under UV/LED
- Not applying excessively thick layers
- Scheduling timely removal (2–3 weeks max)
Think ahead. Your future self will thank you.
Why Patience Is the Real Secret
If there’s one takeaway from learning how to remove gel nails safely without damage, it’s this:
Patience beats force. Every time.
Rushing leads to damage.
Waiting leads to clean, healthy nails.
Simple.
Conclusion
Gel nails are beautiful. No question about it. But removing them the wrong way can undo all that beauty in minutes.
Now you know exactly how to remove gel nails safely without damage—from preparation to aftercare. You’ve got the steps. The tools. The mindset.
Take your time. Follow the process. Treat your nails like they matter—because they do!
And once you get this right?
You’ll never go back to peeling gel off again.
FAQs
Yes, but it takes longer and may be less effective; acetone remains the fastest and most reliable method.
Typically 10–15 minutes, but thicker gel layers may require up to 20 minutes.
Yes, peeling removes layers of your natural nail and causes thinning and damage.
You may not have filed the top coat enough or need more soaking time.
It’s best to use fresh wraps each time to maintain proper acetone saturation and hygiene.
Ideally, give your nails a short break every few cycles to prevent long-term damage.
Use cuticle oil, nail strengtheners, and avoid harsh treatments until your nails recover.
Nail clips are reusable and easier to apply, but both methods work effectively.
No, filing the top coat is essential to allow acetone to penetrate properly.
Yes, lightly buff to remove residue, but avoid over-buffing to prevent thinning.