Getting into nail art doesn’t have to drain your wallet. In fact, starting with an affordable nail art tools for beginners kit is one of the smartest moves you can make if you’re new to DIY manicures. You get the essentials. You learn the basics. And you avoid wasting money on tools you may never use. Simple, right?
Let’s break it all down. Not just what to buy—but how to use it, how much to spend, and how to actually get results that look clean, polished, and worth showing off.
Why Start with an Affordable Nail Art Kit?
Here’s the truth. Most beginners overbuy. They grab everything they see online, then use maybe 30% of it. The rest? It collects dust.
Starting with an affordable nail art tools for beginners kit keeps things focused.
- You reduce risk. If you decide nail art isn’t your thing, you didn’t overspend.
- You learn faster. Fewer tools mean less confusion.
- You experiment more. No pressure to “justify” expensive purchases.
I’ve seen it happen over and over—people who start simple improve faster. They master the basics. Then they upgrade with purpose.
That’s the goal.
What Should Be Included in an Affordable Nail Art Tools for Beginners Kit?
Not all kits are created equal. Some look impressive but lack the essentials. Others are simple—but actually useful.
Here’s what you should look for.
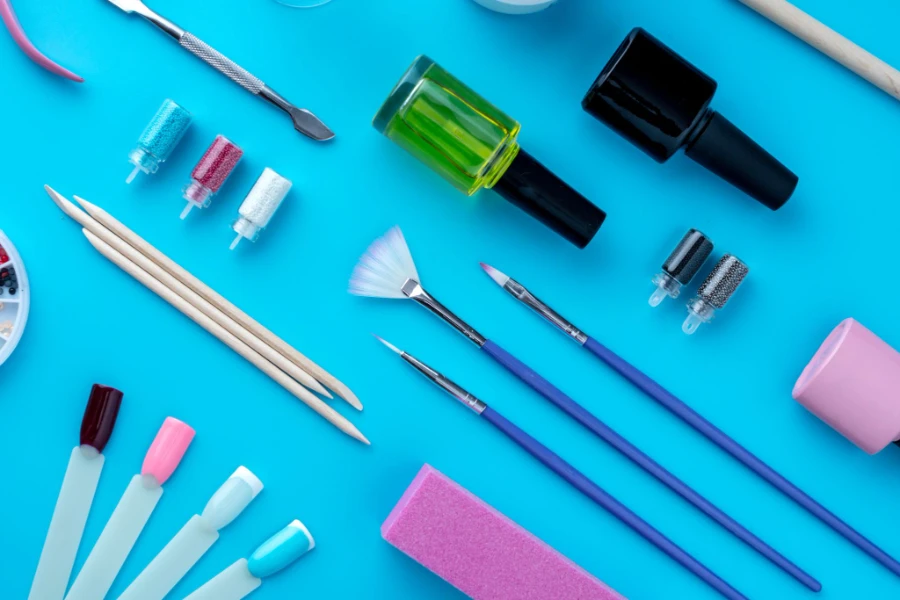
Basic Must-Have Tools
These are non-negotiable.
- Nail file (180/240 grit works best for beginners)
- Buffer block for smoothing the surface
- Cuticle pusher
- Nail clippers
Without proper prep, even the best designs will fail. Chips. Peeling. Uneven polish. It all starts here.
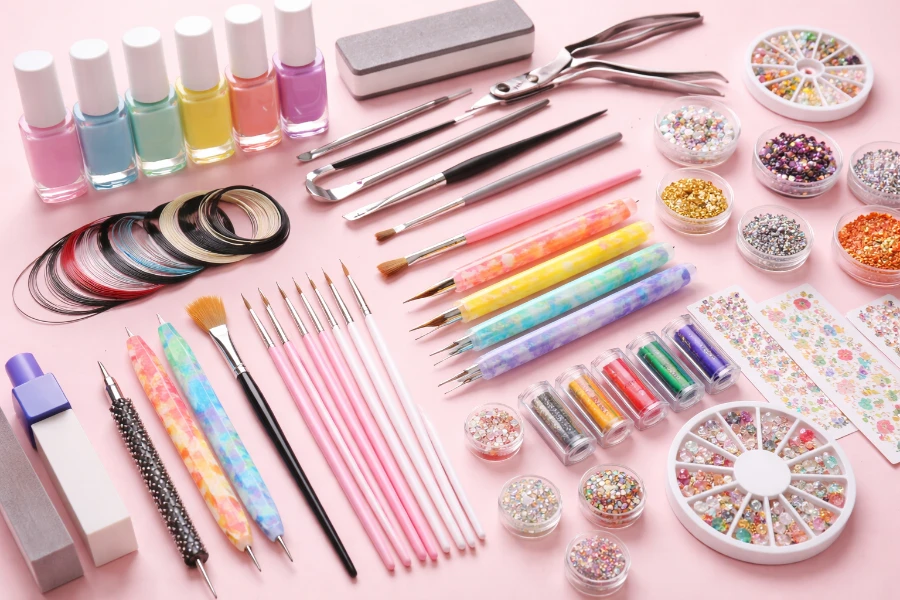
Essential Nail Art Tools
This is where creativity begins.
- Dotting tools – Perfect for polka dots, flowers, and simple patterns
- Nail art brushes – Liner brushes for thin lines, detail brushes for precision
- Striping tape – Clean lines without needing a steady hand
- Makeup sponges – Ideal for ombre and gradient effects
These tools are affordable and incredibly versatile. You can create dozens of designs with just these.
Polishes and Colors
Don’t overcomplicate this part.
- Base coat (protects your nail)
- Top coat (adds shine and durability)
- 3–5 polish colors (mix of neutral and bold)
That’s enough. Seriously.
Extras That Add Value
You don’t need these immediately—but they’re fun.
- Nail stickers and decals
- Rhinestones or gems
- Nail glue
They help you get impressive results fast, even if your technique isn’t perfect yet.
Budget Breakdown: How Much Should You Spend?
Let’s talk numbers.
| Budget Range | What You Can Expect |
| $10–$20 | Basic tools + 1–2 polishes |
| $20–$40 | Full beginner kit with multiple tools |
| $40–$60 | Higher-quality tools + wider color range |
For most people, the sweet spot is around $25–$40.
That’s where a solid affordable nail art tools for beginners kit lives. Enough quality to last. Enough variety to stay creative.
Best Affordable Nail Art Tools to Look For
Cheap doesn’t have to mean low quality. But you do need to know what to look for.
Quality vs Price: What Matters Most
Focus on these:
- Brush bristles – Should be firm, not frayed
- Dotting tools – Metal tips last longer than plastic
- Polish consistency – Avoid watery formulas
If a tool feels flimsy in your hand, it probably won’t perform well either.
Recommended Beginner Tool Types
- Multi-use dotting tools (different tip sizes)
- Dual-ended brushes (save space and money)
- Reusable tools over disposable ones
Compact kits are great—but sometimes buying a few individual tools gives you better quality for the same price.
Step-by-Step: How to Use Your Beginner Nail Art Kit
This is where everything comes together. Let’s keep it simple.
Step 1: Nail Preparation
Clean your nails. Shape them. Push back cuticles.
Skip this step, and your manicure won’t last. No exceptions.
Step 2: Applying Base Color
Apply a thin base coat. Let it dry.
Then apply your color in thin layers. Not thick. Never thick. Thick polish leads to smudging and uneven drying.
Step 3: Creating Simple Nail Art Designs
Start small.
- Use dotting tools for polka dots
- Try striping tape for clean lines
- Use a sponge for gradients
Interestingly, working with tools and patterns can sometimes feel like practicing fine motor skills, where small, controlled movements improve precision over time. The more you practice, the steadier your hand becomes.
Don’t aim for perfection. Aim for consistency.
Step 4: Sealing Your Design
Top coat. Always.
It locks in your design and adds shine. It also protects your work from chips.
Common Mistakes Beginners Should Avoid
I’ve made these mistakes myself. Learn from them.
- Buying too many tools too early
- Skipping base or top coat
- Applying thick polish layers
- Not cleaning tools after use
One small habit change can dramatically improve your results.
Easy Nail Art Designs You Can Create with a Beginner Kit
You don’t need advanced skills to create something eye-catching.
Beginner-Friendly Ideas
- Polka dots – Use dotting tools with contrasting colors
- French tips – Classic, clean, and always stylish
- Ombre nails – Blend two colors with a sponge
- Minimalist lines – Thin stripes using liner brushes
These designs are simple—but they look professional when done right.
Once you’re comfortable with the basics, you can explore more detailed and themed looks—like Disney toe nails creative designs.
Tips to Make Your Nail Art Last Longer
This is where most beginners struggle. Good news—it’s fixable.
- Prep your nails properly
- Use thin layers
- Seal edges with top coat
- Avoid water exposure for a few hours after application
Interestingly, durability in nail coatings can relate to how substances bond and dry—concepts loosely connected to polymerization, which explains why proper layering and curing matter so much.
Small details make a big difference.
Where to Buy Affordable Nail Art Tools
You’ve got options.
- Online marketplaces (Amazon, Shopee, Lazada)
- Local beauty supply stores
- Drugstores with nail sections
Compare bundles carefully. Sometimes kits look cheaper but include low-quality items.
A well-chosen affordable nail art tools for beginners kit will always outperform a bigger, lower-quality set.
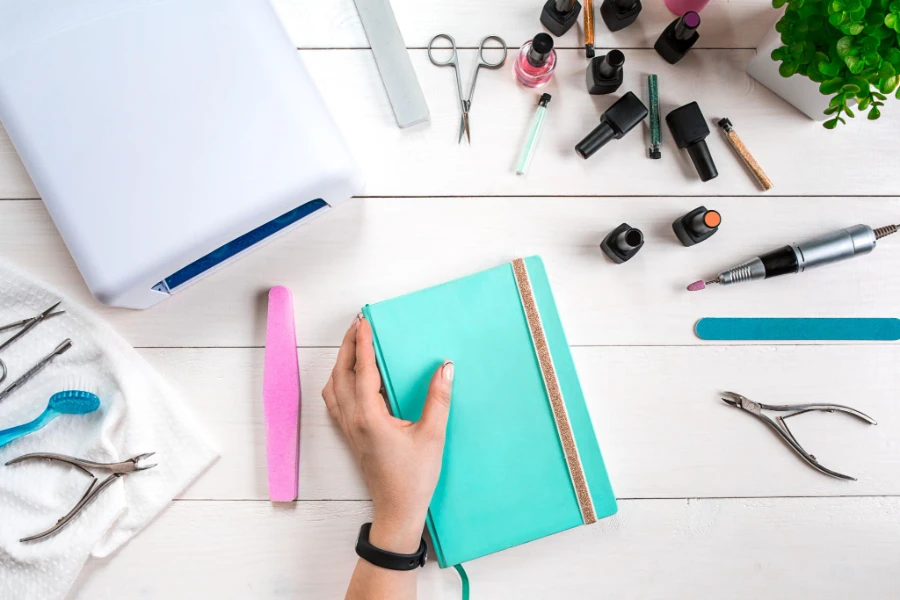
Upgrading Your Kit: When and What to Add Next
You’ll know you’re ready to upgrade when:
- You’re consistently doing nail art
- You want more advanced designs
- Your current tools feel limiting
Next-Level Additions
- UV/LED lamp for gel polish
- Stamping kits
- Advanced brush sets
- Gel polish collections
Upgrade slowly. Build your kit based on your style.
Final Thoughts
Starting nail art doesn’t require a huge investment. It requires the right approach.
An affordable nail art tools for beginners kit gives you everything you need to learn, practice, and improve without overspending. It keeps things simple. It keeps things focused. And most importantly—it keeps things fun!
I’ve seen beginners go from basic dots to intricate designs in just a few weeks. Not because they had expensive tools—but because they mastered the basics first.
That’s your path.
Start small. Stay consistent. Upgrade when you’re ready.
And enjoy every step of the process!
FAQs
It usually includes basic tools like nail files, dotting tools, brushes, and a few polish colors to get started.
A good beginner kit typically costs between $25 and $40, offering a balance of quality and affordability.
No, beginners can achieve great results using an affordable nail art tools for beginners kit.
Yes, simple tools like dotting tools and brushes can create a wide range of beginner-friendly designs.
Proper nail prep, thin polish layers, and a good top coat will significantly improve durability.
Yes, as long as they are functional and durable, budget tools are perfect for beginners learning the basics.
You should clean them after every use to maintain hygiene and ensure better performance.
Polka dots and simple lines are the easiest designs to start with using basic tools.
Upgrade when you feel limited by your current tools or want to try more advanced designs.
You can find them online, in beauty supply stores, or at drugstores with nail care sections.