There’s something about hibiscus flower nail art ideas that instantly shifts your mood. One glance and you’re somewhere warmer. Brighter. Slower. The colors feel alive. The petals feel intentional. And unlike trendy nail fads that fade in a season, hibiscus designs return year after year because they carry presence.
I’ve worked with countless floral styles, but hibiscus stands apart. It’s bold without being busy. Feminine without feeling delicate. Tropical without looking costume-like. When executed well, hibiscus flower nail art ideas strike a rare balance between statement and sophistication. If you’re planning a summer refresh, a beach vacation set, or simply want something that feels expressive but wearable, this guide will give you real direction. Not vague inspiration. Actual design strategy, color pairings, shape placement advice, and technique breakdowns you can use immediately. Let’s build this properly.
Why Hibiscus Works So Well on Nails
The hibiscus flower belongs to the genus Hibiscus, part of the mallow family. Botanically, it’s known for its broad five-petal structure and prominent stamen. (If you enjoy deeper botanical context, you can explore the plant’s classification under the term Malvaceae.)
That structure is perfect for nail art. Unlike roses or peonies that require heavy layering and intricate shading, hibiscus flowers can be simplified without losing identity. You can create a minimalist outline version. Or a hyper-detailed airbrushed bloom. Both still read clearly. It’s graphic. That’s the advantage.
The larger petal structure also means the design adapts to different nail lengths. Short nails? Place a half bloom at the corner. Long coffin or almond nails? Showcase a full five-petal flower across the nail bed. And visually, hibiscus flowers naturally command attention. They don’t get lost against bright backgrounds. That makes them ideal for summer palettes, ombré blends, or chrome finishes.
The Most Popular Hibiscus Flower Nail Art Ideas Right Now
Let’s move into actual design direction. These hibiscus flower nail art ideas consistently perform well in salons and on social feeds because they balance impact and wearability.
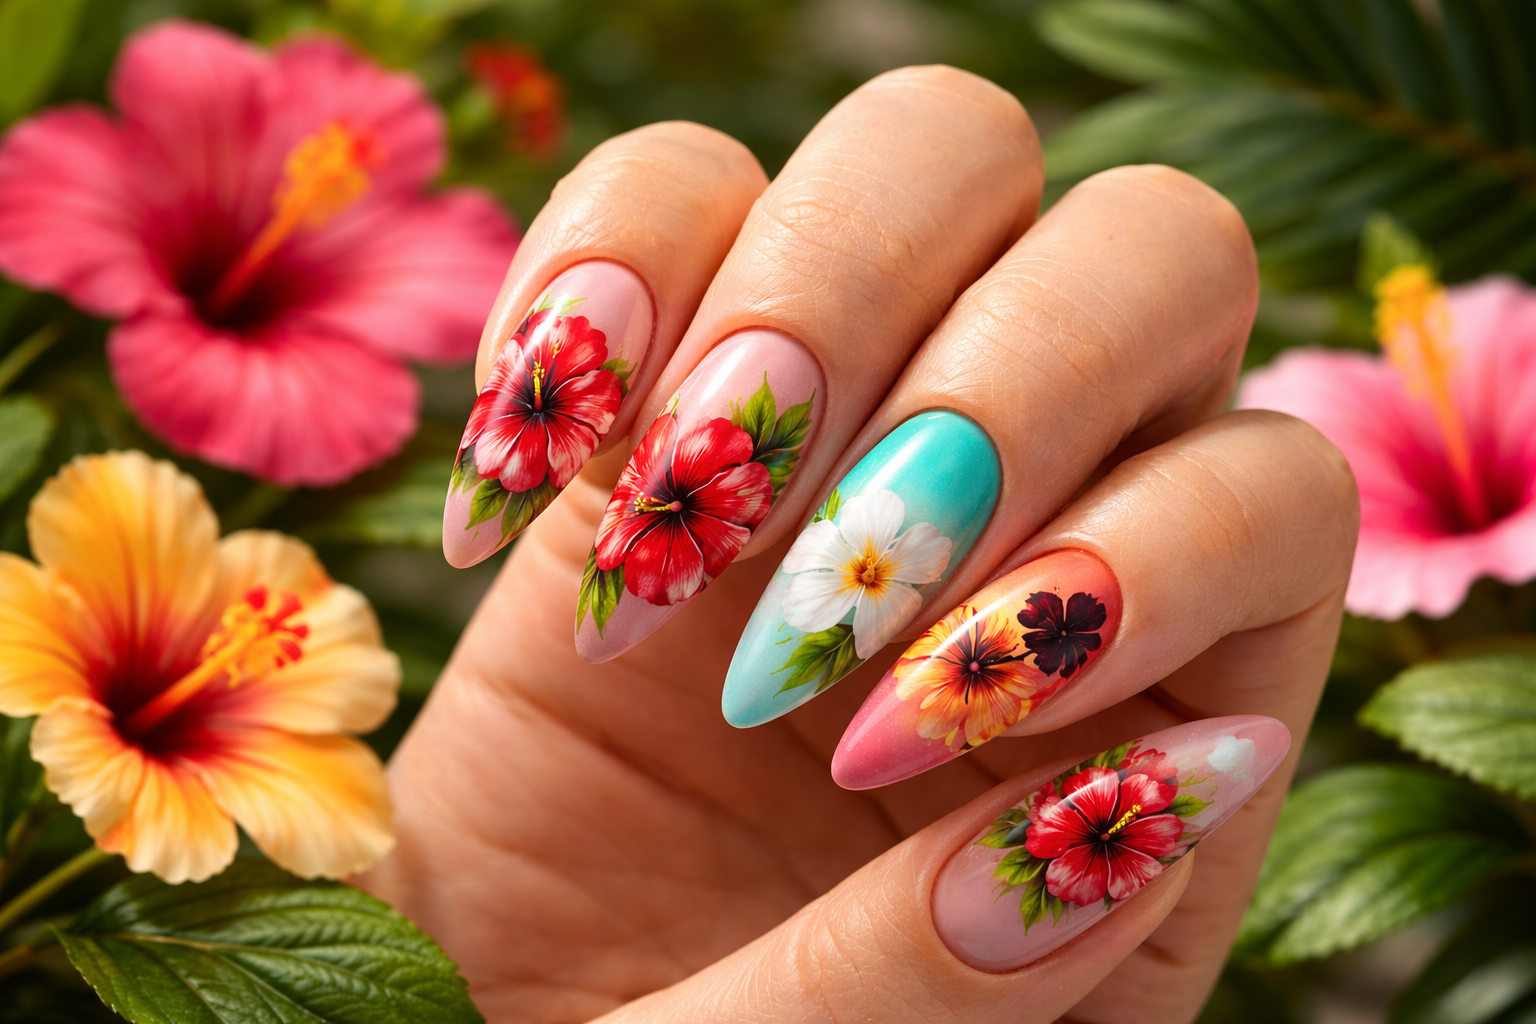
1. Classic Red Hibiscus on Nude Base
This is the timeless option.
A neutral beige or sheer pink base creates breathing room. Then one or two red hibiscus blooms become the focal point. Add subtle white highlights in the petal center for dimension.
Why it works:
- High contrast without chaos
- Elegant enough for weddings
- Vacation-ready without looking loud
This style is ideal for almond and oval shapes.
2. White Hibiscus on Sky Blue
Think ocean. Think shoreline.
A soft sky-blue or turquoise base paired with white hibiscus petals creates a fresh beach aesthetic. Add a tiny yellow dot in the center to mimic natural pollen.
Execution tip: Use a thin liner brush for the petal edges, then fill inward with slightly diluted polish to avoid thickness buildup. This pairs beautifully with ocean inspired nail designs with wave accents, especially if you dedicate one or two nails to subtle white wave detailing while keeping the hibiscus as the focal bloom.
3. Sunset Ombre with Black Hibiscus Silhouette
This one feels dramatic. Blend coral, orange, and golden yellow into a smooth ombré background. Once cured, paint a thin black hibiscus silhouette over one side of the nail. It creates depth instantly.
Best shapes:
- Coffin
- Stiletto
- Long almond
This version of hibiscus flower nail art ideas feels bold but refined.
4. Minimalist Hibiscus Outline
Not everyone wants full color saturation. A single-line hibiscus outline over a clear or milky base looks modern. Clean. Editorial. This is perfect for professionals who want personality without overwhelming the look. It’s subtle. But intentional.
5. French Tip with Micro Hibiscus Accent
Here’s how you elevate a French manicure. Keep the classic white tip. Add a tiny hibiscus bloom near the cuticle or at one corner of the nail. Keep it small. Precision matters. This style works beautifully on shorter nails.
Choosing the Right Nail Shape for Hibiscus Designs
The same flower looks different depending on nail architecture. Placement changes everything.
Short Square Nails
- Opt for half flowers at the edge
- Avoid overcrowding
- Use brighter petals for visibility
Almond Nails
- Position blooms slightly off-center
- Elongate petals to follow nail curve
- Add negative space for elegance
Coffin/Ballerina Nails
- Showcase full five-petal blooms
- Try multi-flower layering
- Use gradient backgrounds
Stiletto Nails
- Dramatic color contrasts
- Single oversized bloom
- Thin, sharp petal outlines
Structure first. Then art.
Color Palette Strategy for Hibiscus Flower Nail Art Ideas
Color theory plays a major role here. If you want to understand how complementary color contrast works at a deeper level, you can explore the concept of chromatic aberration for visual context. While chromatic aberration relates to optics, the principle of color separation helps explain why strong contrast makes floral designs stand out more vividly.
Here’s a practical breakdown:
| Vibe | Petal Colors | Background Suggestions |
| Classic Tropical | Red, Coral, Fuchsia | Nude, Teal, Soft Pink |
| Pastel Soft | Baby Pink, Lavender | Milky White, Pale Blue |
| Neon Summer | Hot Pink, Electric Orange | Clear Base, Bright Yellow |
| Modern Chic | Black, Deep Plum | Matte Nude, Soft Gray |
| Luxe Glow | Chrome Pink, Metallic Red | Glossy Sheer Base |
High contrast ensures clarity. If the petal color blends too closely with the background, the design loses impact.
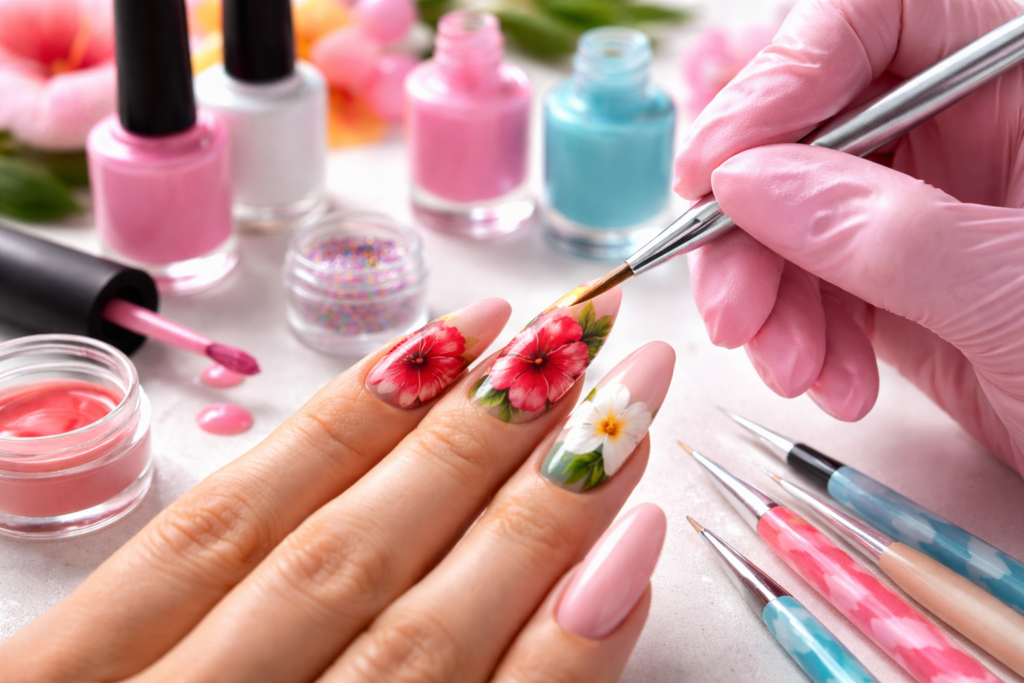
How to Create Hibiscus Flower Nail Art at Home
Let’s simplify the technique.
Tools You’ll Need
- Thin liner brush
- Dotting tool
- Base coat
- Two petal colors (main + highlight)
- Center color (yellow or white)
- Glossy top coat
The Basic 5-Petal Method
- Start with your cured base color.
- Using your liner brush, paint five oval-shaped petals radiating outward from a center point.
- Add a slightly lighter shade near the center of each petal to create dimension.
- Use your dotting tool to place small dots for the stamen.
- Seal with top coat.
Let it breathe between layers. Thick polish ruins floral precision. If you’re working with gel, cure between each layer to prevent dragging.
When to Go to a Professional Nail Artist
DIY works for simple versions. But some hibiscus flower nail art ideas require professional skill.
Choose a salon when you want:
- Smooth ombré blending
- 3D acrylic petals
- Airbrushed gradients
- Chrome overlays
3D petals, especially, require acrylic sculpting control. Poor technique leads to bulky nails that snag.
Cost Expectations

Pricing varies by location, but here’s a realistic overview:
| Design Complexity | Estimated Cost (USD) |
| Basic Hand-Painted Accent | $10–$20 add-on |
| Full Set with Floral Art | $50–$90 |
| Gel Extensions + Hibiscus | $80–$150 |
| 3D Acrylic Floral Set | $120+ |
More detail equals more time. More time equals higher cost.
Making Your Hibiscus Nails Last Longer
Tropical designs deserve longevity.
Here’s what matters:
- Prep the nail plate thoroughly
- Push back cuticles properly
- Cap the free edge with top coat
- Reapply clear top coat every 4–5 days (for regular polish)
- Avoid prolonged water exposure in the first 24 hours
If you’re heading somewhere humid, gel polish holds up better.
Final Thoughts
Hibiscus flower nail art ideas endure because they capture a feeling. Warmth. Movement. Energy. They feel like sunshine in design form. And the beauty is flexibility. You can go minimalist or dramatic. Matte or glossy. Soft or electric. If you’re approaching this intentionally choosing the right color pairing, nail shape, and placement hibiscus nail art won’t just look trendy. It will look curated.
And that’s the difference. Choose your palette. Refine your technique. Keep the petals clean and deliberate. Then seal it with confidence. That’s how you make hibiscus unforgettable.
FAQs
Yes. Smaller blooms or half-flower accents work beautifully on short square or round nails.
Red, coral, pink, and white are classic choices, but pastel and neon variations also look stunning.
Absolutely. Start with a simple five-petal design and use a thin liner brush for cleaner edges.
With gel polish, it can last up to three weeks; regular polish typically lasts about a week with proper care.
Yes, especially minimalist or outline versions on neutral bases.
A fine detail brush and dotting tool are enough for most designs.
Add subtle shading near the petal center and include small stamen dots for dimension.
They can be, but they’re better suited for events since raised elements may snag.
Almond and coffin shapes showcase full blooms best, but any shape can work with proper placement.
Yes, they pair well with palm leaves, ombré sunsets, and even subtle wave accents.