
Mardi Gras nail designs for beginners don’t have to feel overwhelming. In fact, they shouldn’t. Mardi Gras is loud, joyful, imperfect, and expressive and your nails can reflect that without requiring advanced skills or salon-level precision. You don’t need tiny brushes, professional training, or hours of patience. You need a plan, a few smart techniques, and the confidence to keep things simple.
This guide is built for beginners who want festive nails that look intentional, polished, and fun. Not cluttered. Not stressful. Just wearable Mardi Gras nail designs for beginners that actually work at home.
I’ll walk you through colors, tools, prep, easy designs, and common mistakes step by step so you can create Mardi Gras nail designs for beginners that feel celebratory without feeling complicated.
Let’s get into it.
What Makes Mardi Gras Nail Designs Instantly Recognizable
Mardi Gras nail designs are defined by contrast and symbolism. The look is bold, but not chaotic when done right. Understanding the visual language of Mardi Gras makes every design choice easier especially for beginners.
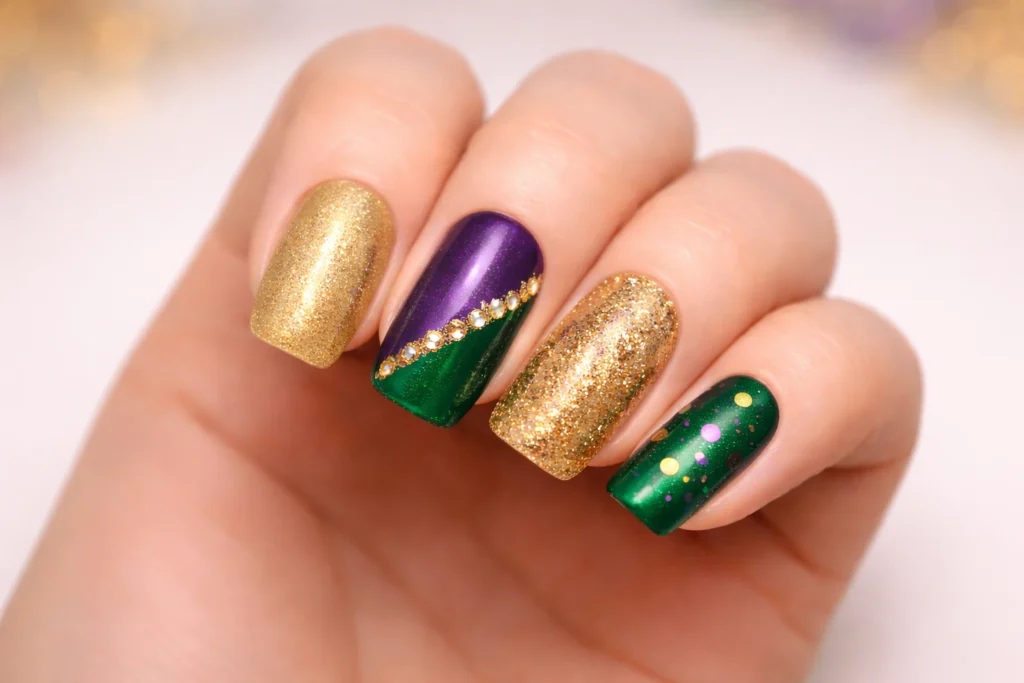
The Core Mardi Gras Colors
Mardi Gras traditionally uses three colors:
- Purple – represents justice
- Green – symbolizes faith
- Gold – stands for power
For beginners, these colors work best when used strategically, not all at once on every nail.
Color placement matters more than detail. The way metallic gold reflects light next to saturated purple or green can even mirror principles seen in Metachromism, where surrounding colors influence how a pigment is perceived. You don’t need to understand the science to benefit from it just remember that contrast does the heavy lifting in Mardi Gras nail designs for beginners.
Common Mardi Gras Motifs (Simplified)
You’ll often see:
- Masks
- Beads
- Confetti
- Metallic finishes
As a beginner, you don’t need to recreate these elements literally. You just need to suggest them through color blocking, sparkle, or texture.
Nail Prep: The Step Beginners Skip and Regret
Design doesn’t matter if your base isn’t solid. Prep is what separates nails that look “home done” from nails that look clean and intentional.
Beginner Nail Prep Checklist
Before touching polish, do this:
- Remove all old polish completely
- Shape nails evenly (round or soft square is easiest)
- Lightly buff the surface to remove shine
- Push cuticles back gently never aggressively
- Wash hands and dry thoroughly
Proper nail hygiene also protects your skin. The Centers for Disease Control and Prevention emphasizes keeping hands clean and avoiding unnecessary skin cuts to reduce the risk of irritation or infection something beginners often overlook when practicing nail art repeatedly.
Finish prep with a base coat. Always. Skipping this step shortens wear time and makes mistakes harder to fix.
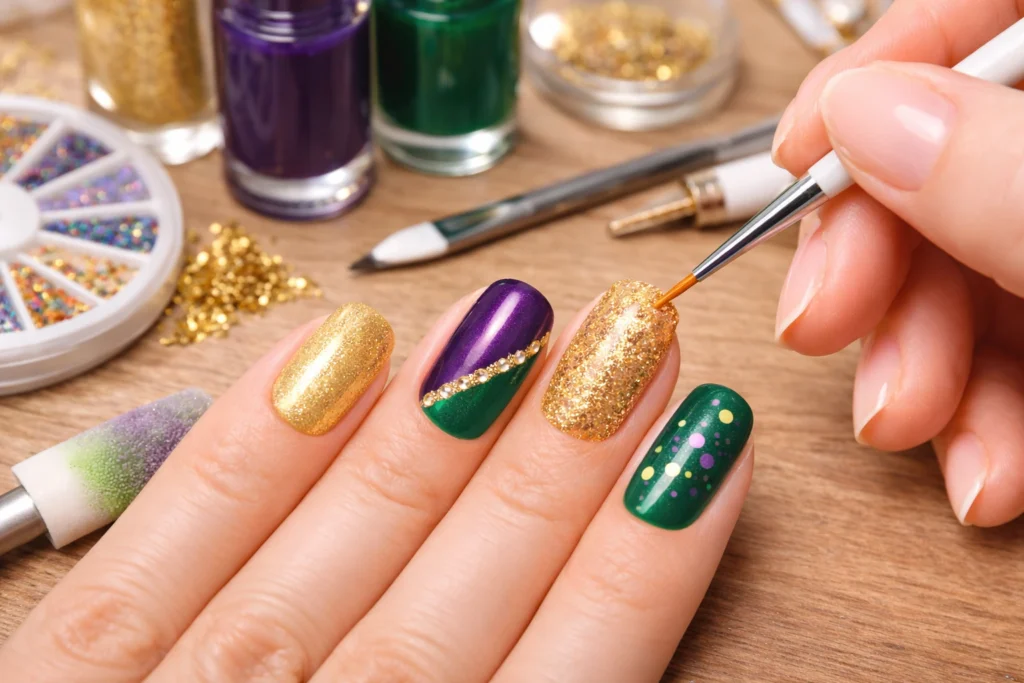
Beginner Nail Tools You Actually Need
You don’t need a drawer full of tools. Most Mardi Gras nail designs for beginners can be done with basics.
Essential Tools
| Tool | Why It Matters |
| Base coat | Smooths nails and prevents staining |
| 2–3 polish colors | Purple, green, gold, or glitter |
| Top coat | Locks everything in |
| Toothpick or bobby pin | Easy dotting tool |
| Makeup sponge | Best for glitter or gradients |
If a design requires specialized equipment, it’s not beginner-friendly.
Choosing Mardi Gras Colors Without Overdoing It
This is where many beginners get stuck. They try to use everything at once. The result usually feels busy instead of festive.
Beginner Color Pairings That Work
- Purple + gold
- Green + gold
- Purple + green with gold as an accent
Easy Color Distribution Formula
For a 10-nail set:
- 6 nails: main color
- 3 nails: secondary color
- 1 nail: accent
This formula keeps Mardi Gras nail designs for beginners visually balanced every time.
Easy Mardi Gras Nail Designs for Beginners
These designs look intentional but stay manageable.
Solid Color with Gold Accent
Paint all nails purple or green. Choose one accent nail and apply gold glitter. Seal with top coat. Simple. Polished. Effective.
Glitter Tips (Beginner-Friendly)
Forget perfect French tips. Use a sponge to dab gold glitter onto the tips instead. Imperfect edges look festive, not messy.
Polka Dot Mardi Gras Nails
Dots are forgiving. Use a toothpick to add purple, green, or gold dots over a solid base. Vary the size slightly to keep things playful.
Confetti-Style Nails
Random placement works in your favor here. Scatter dots or glitter flakes across the nail. No symmetry required.
These styles are staples of Mardi Gras nail designs for beginners because they rely on effect not precision.
Simple Patterns That Don’t Overwhelm
Patterns don’t have to be complicated.
- Vertical stripes
- Diagonal color blocks
- Half-moon accents
Limit each nail to two colors max. More than that adds stress without adding style.
Accent Nails: The Beginner’s Shortcut
Accent nails let you experiment safely.
- Gold foil
- Glitter
- Stickers
- One bold pattern
Trying to decorate every nail increases mistakes. Accent nails create focus.
Glitter Without the Mess
Glitter spreads fast if you’re not careful.
- Use fine glitter
- Apply with a sponge
- Press, don’t drag
- Seal twice
Glitter should look intentional—not accidental.
Common Beginner Mistakes
Avoid these:
- Using all three colors on every nail
- Thick polish layers
- Rushing drying time
- Skipping top coat
Thin layers and patience do more for Mardi Gras nail designs for beginners than any fancy technique.
Making Mardi Gras Nails Last
- Apply quality base and top coat
- Avoid water for the first hour
- Reapply top coat after two days
- Wear gloves when cleaning
Longevity matters when you’re celebrating.
Last-Minute Mardi Gras Nail Ideas
Short on time?
- One bold color + glitter top coat
- Press-on accents
- Metallic polish alone
Gold polish by itself still counts as festive.
Matching Designs to Nail Length
- Short nails: dots, glitter, solid colors
- Medium nails: stripes, accents
- Long nails: gradients, mixed finishes
Mardi Gras nail designs for beginners should work with your nails not against them.
Final Thoughts
Mardi Gras nail designs for beginners don’t need perfection. They need confidence, balance, and a little shine. Keep designs simple. Let color do the work. Seal everything well.The goal isn’t flawless nails.
It’s festive nails you enjoyed creating.
FAQs
No. Most Mardi Gras nail designs for beginners rely on simple color placement, glitter, or dots rather than detailed nail art.
Not at all. Basic polish, a toothpick or bobby pin, and a good top coat are enough for beginner-friendly designs.
Two colors plus one accent shade works best and keeps the design clean and balanced.
Yes. Solid colors, glitter accents, and polka dots look especially good on short nails.
A solid purple or green manicure with one gold glitter accent nail is the simplest and most reliable option.
Use thin polish layers, seal the edges with top coat, and avoid water for the first hour after application.
It can be messy, but using a sponge to press glitter onto the nail makes it much easier to control.
Yes. Stickers are a great shortcut and help beginners achieve festive results without precision work.
With proper prep and top coat, they can last five to seven days without major chipping.
No. Using one or two accent nails often looks more polished than decorating every nail.