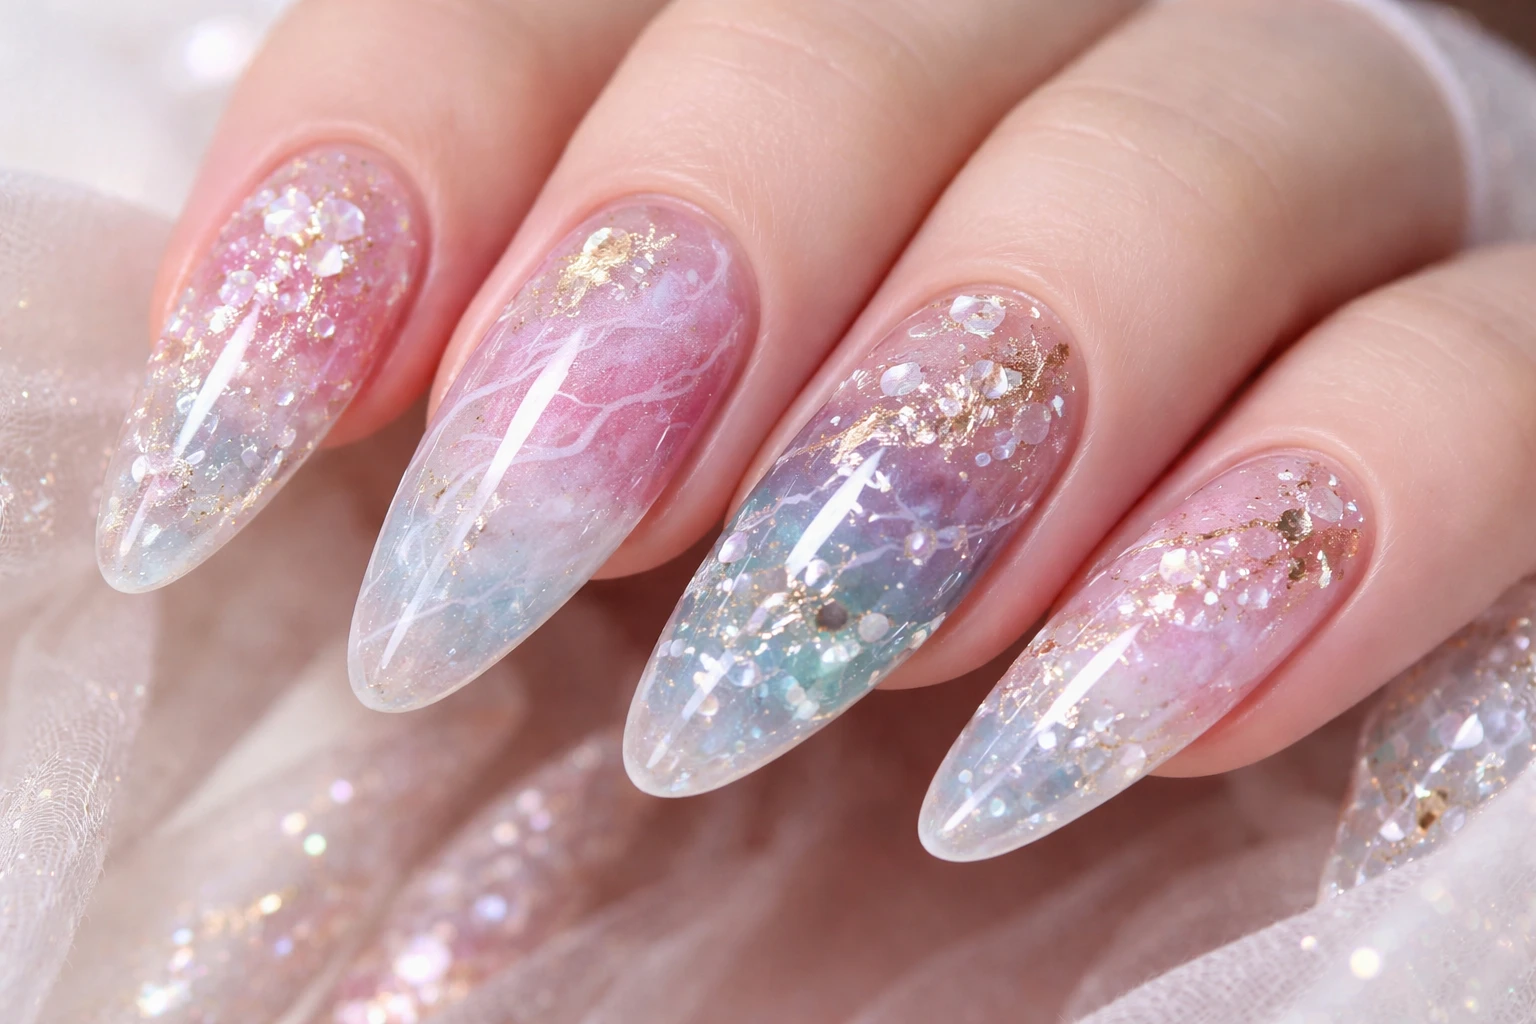
Gel layering for depth isn’t just a technique. It’s a shift in how you approach nail design. The moment you understand how to build dimension through controlled gel layering, your work stops looking flat and starts looking intentional, luminous, and alive. Flat color is fine. But depth? Depth changes everything.
When light hits a properly layered nail, it doesn’t just bounce off the surface. It travels through it. It refracts. It reflects back in subtle ways. That’s what makes a set look expensive. Thoughtful. Editorial. And yes professional. If you’re serious about elevating your craft, gel layering for depth needs to be part of your toolkit. Let’s break it down properly.
What Is Gel Layering?
At its core, gel layering is the strategic application of multiple gel layers clear, tinted, opaque, decorative to create visual dimension. Not thickness. Dimension.
That distinction matters. Regular polish stacks color on top of color. Gel layering for depth builds visual space between elements. You’re creating foreground, midground, and background within a few millimeters of product.
Think of it like this:
- Base = foundation
- Transparent layers = atmosphere
- Art elements = focal point
- Top coat = glass ceiling
The magic happens in the spacing.
The Science Behind Depth
Let’s talk light. Briefly.
When light hits a flat opaque surface, it reflects directly back. That’s it. One layer. One response. When light hits a layered gel structure, it passes through translucent layers, reflects off embedded elements, and then returns to the eye. That layered reflection creates perceived depth.
From a physics standpoint, this involves light refraction the bending of light as it moves through materials with different densities. If you want to understand the deeper optical science behind this, the concept of refraction is explained thoroughly. You don’t need to become a physicist. But understanding that gel layering for depth manipulates how light travels through transparent and semi-transparent materials helps you make smarter design choices.
Transparency vs. Opacity
Understanding this distinction is critical:
| Product Type | Effect | Best Use |
| Clear Builder Gel | Maximum transparency | Encapsulation, floating effects |
| Sheer Tint Gel | Soft color diffusion | Background glow |
| Opaque Gel Paint | Strong definition | Line work, focal details |
| Glitter/Flake Gel | Reflective layering | Mid-layer sparkle |
If everything is opaque, nothing has depth. If everything is transparent, nothing has contrast.
Balance wins.
Safety & Professional Standards Matter
Before we go deeper into technique, a quick but important note: professional nail application requires proper sanitation and ventilation. The U.S. Occupational Safety and Health Administration (OSHA) provides official safety guidelines for nail salons and product handling.
Even when focusing on artistic techniques like gel layering for depth, maintaining air quality, curing properly, and preventing skin exposure to uncured gel are non-negotiable standards. Artistry and safety go hand in hand.
The Foundation: Prep Makes or Breaks Depth
Depth won’t save poor prep.
Start clean. Always.
- Shape and refine the nail.
- Remove cuticle buildup thoroughly.
- Dehydrate.
- Apply primer sparingly.
- Apply a thin, even base layer.
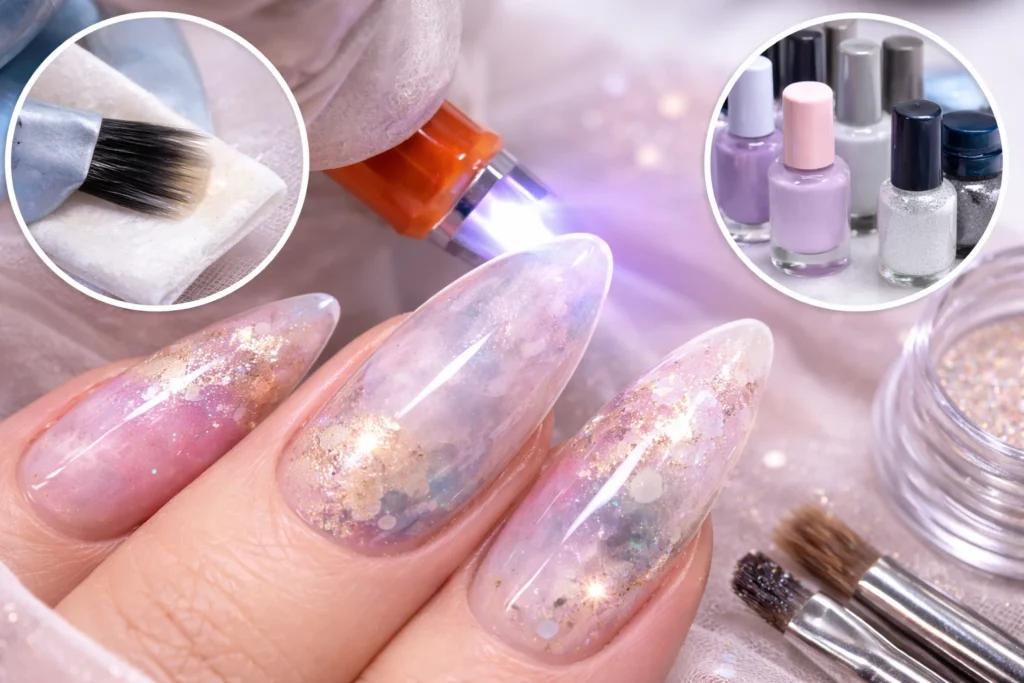
Cure properly. No shortcuts. Gel layering for depth amplifies everything good or bad. Uneven foundation equals distorted layers.
Step-by-Step: Building Depth With Intention
Here’s a structured system that consistently produces dimensional results.
Step 1: Establish the Background
Apply a sheer tint as your base color. Not opaque. Sheer. This creates visual distance. Cure fully. Sheer bases allow light to penetrate through future layers, which is essential for gel layering for depth to truly work.
Step 2: Introduce a Controlled Focal Point
Add part of your design. Not all of it.
Maybe that’s:
- A partial marble vein
- A few scattered foil fragments
- The base shadow of a flower
Cure again.
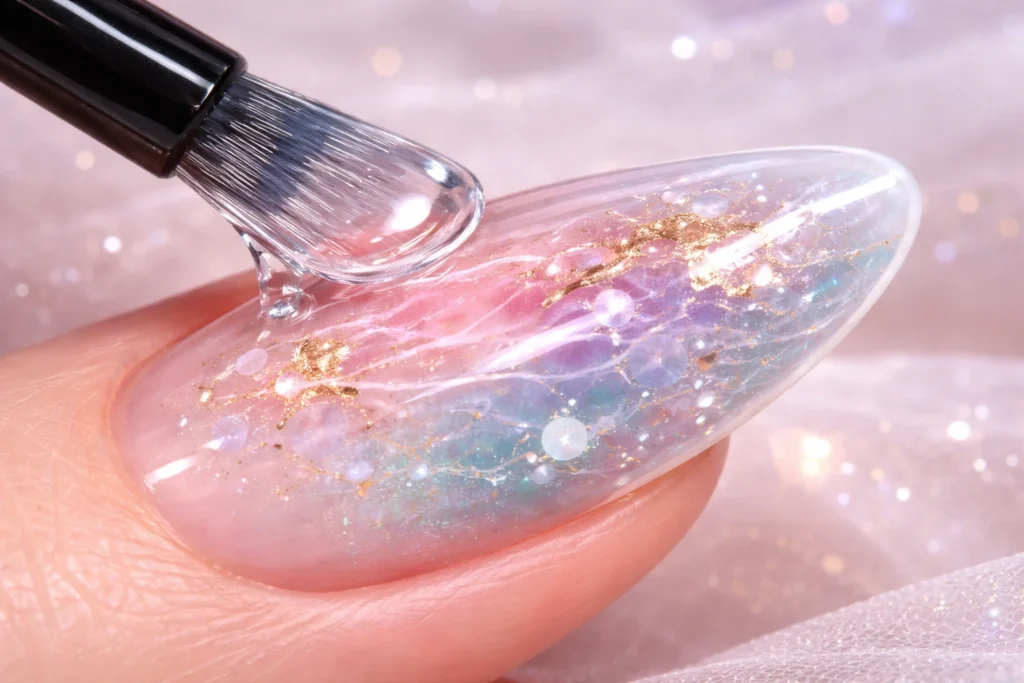
Step 3: Create Separation With Clear Gel
Apply a thin layer of clear builder gel over the art. Float it gently. Cure. Now your art is no longer sitting on the surface it’s suspended beneath a transparent layer. That separation is where gel layering for depth becomes visible.
Step 4: Add Mid-Layer Detail
On top of the cured clear layer, add more detail:
- Fine line accents
- Micro glitter
- Soft shadow work
Cure. You’re building dimension like a painter builds glazes thin, intentional applications that alter how light interacts with each layer.
Step 5: Final Encapsulation
Apply a final thin clear layer to seal everything in. Refine shape if necessary. Apply Matte top coats. Cure fully. Now your design has internal structure not just surface decoration.
Advanced Gel Layering Techniques
Once you master the fundamentals, your designs can evolve dramatically.
Encapsulated Flake Suspension
Place iridescent flakes in uneven clusters. Seal with clear. Add fine highlights on top. The flakes appear suspended within the nail rather than pasted on top. That’s dimensional illusion at its best.
Layered Marble for Depth
Instead of swirling all colors at once:
- Apply sheer base.
- Cure.
- Add diluted marble veins.
- Cure.
- Add fine highlight veins.
- Encapsulate.
Layered marble looks richer than single-pass marble. Always.
Underwater Glass Effect
For ocean-themed sets:
- Apply translucent aqua base.
- Cure.
- Add micro-glitter and small bubble dots.
- Cure.
- Add faint white wave accents.
- Seal with clear.
Gel layering for depth makes this look immersive, not chaotic.
Avoiding the Bulk Problem
Let’s address a common mistake. Depth is visual. Not physical. If your nail looks bulky, you’re applying too much product per layer.
Solutions:
- Keep every layer thin.
- Let gels self-level.
- Refine structure before top coat.
- Maintain a balanced apex.
If sidewalls are expanding outward, stop and reassess. Control equals elegance.
Troubleshooting Common Problems
Cloudy Layers
Causes:
- Under-curing
- Mixing incompatible gel systems
- Contaminated brushes
Solution:
- Cure properly.
- Stay consistent with brands.
- Clean brushes thoroughly.
Art Still Looks Flat
Ask yourself:
- Did I encapsulate?
- Did I alternate opacity levels?
- Did I create separation with clear gel?
If all design elements sit on the same visual plane, gel layering for depth cannot function properly. Contrast and spacing are mandatory.
When to Use Clear vs. Tinted Layers
Use clear layers when:
- You want suspension
- You’re embedding flakes or dried flowers
- You’re creating “glass” effects
Use tinted layers when:
- You want atmospheric color
- You’re softening contrast
- You’re blending gradients
Alternating clear and sheer tinted layers adds subtle internal glow. And that glow? Clients notice it.
Why Gel Layering for Depth Elevates Your Brand
Clients may not know the term. But they recognize the result. When light hits layered art and shifts slightly as the hand moves, it feels luxurious. Intentional. Advanced. Flat art blends in. Dimensional art stands out.
Mastering gel layering for depth positions you as someone who understands structure not just decoration. And in a crowded nail industry, that matters.
Final Thoughts
Gel layering for depth is about precision, restraint, and understanding how light interacts with transparent materials. It blends artistry with optical awareness and professional discipline.
Thin layers.
Intentional sequencing.
Proper curing.
Safe practices.
Start simple. Observe how light moves through your layers. Adjust. Over time, you’ll stop thinking about the steps and start instinctively building dimension into every set. That’s when your work transforms. That’s when gel layering for depth becomes second nature. And that’s when your nail art truly comes alive.
FAQs
Gel layering for depth is the technique of applying multiple thin gel layers to create dimension and a multidimensional visual effect.
Yes, beginners can start with simple sheer and clear layers before moving into complex encapsulated designs.
If the nail looks bulky or loses its natural shape, you’ve likely applied too many or too thick layers.
Builder gel is highly recommended because it creates separation and structure between design elements.
You may not be alternating between opaque and transparent layers or encapsulating properly.
It shouldn’t if each layer is applied thinly and the structure is refined before top coat.
Regular polish doesn’t provide the same encapsulation or transparency control as gel systems.
Avoid overworking the gel and allow it to self-level before curing.
Yes, when applied and removed correctly, gel layering for depth does not damage the natural nail.
Galaxy nails, encapsulated florals, marble effects, and underwater designs benefit most from layered dimension.