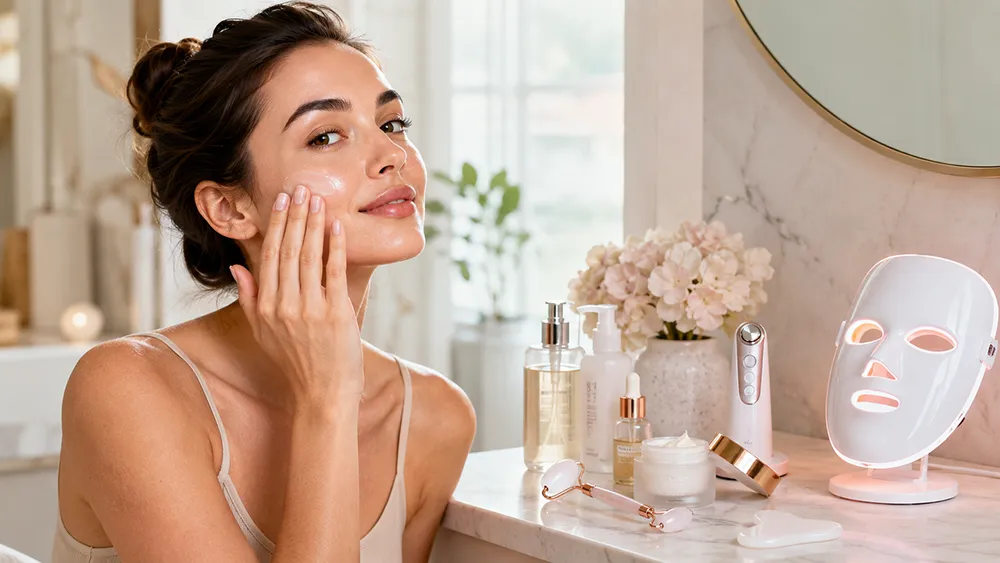
A well-planned at-home facial routine can make your skin look smoother, fresher, and more refined without turning your bathroom into a miniature spa laboratory. You do not need twenty products. You do not need to follow every beauty trend. What you need is a thoughtful sequence, a little patience, and enough consistency to let your skin respond.
That sounds simple.
In practice, many routines become complicated fast. A cleanser leads to a toner, which leads to three serums, two devices, an exfoliating pad, a mask, and a facial oil that may or may not agree with everything underneath it. Before long, the skin feels tight, irritated, or overwhelmed.
The goal is not to do more. It is to do the right things in the right order.
An effective at-home facial routine should support hydration, gentle renewal, facial massage, temporary depuffing, skin barrier care, and daily protection. Modern beauty devices can also play a role, provided they are selected carefully and used correctly.
Let’s build the routine step by step.
Why an At-Home Facial Routine Is Worth the Effort
Skin responds well to consistency.
A single facial may leave your complexion feeling soft for a day or two, but regular daily care is what helps maintain smoother texture, better hydration, and a more comfortable skin barrier over time. That is where an at-home facial routine becomes useful.
Done properly, it may help you:
- Remove makeup, oil, sunscreen, and surface debris
- Improve the look of dull or dehydrated skin
- Reduce the appearance of temporary puffiness
- Support softer, more supple-looking skin
- Create a more even-looking surface
- Build a calming self-care habit
- Use skincare products more intentionally
There is also something satisfying about having a routine that feels deliberate.
You are not just applying products randomly. You understand what each step is doing, when it belongs, and when it should be skipped. That makes the process easier to maintain and far less expensive than constantly buying new items in search of instant results.
Understand Your Skin Before You Start
Before choosing products or devices, pay attention to your skin’s actual condition.
Not what it looked like six months ago. Not what an influencer’s skin needs. Yours.
Identify Your General Skin Type
Most people fall broadly into one of these categories:
| Skin Type | Common Characteristics | Routine Priority |
|---|---|---|
| Dry | Tightness, flaking, rough patches | Hydration and barrier support |
| Oily | Shine, enlarged-looking pores, congestion | Gentle cleansing and balanced moisture |
| Combination | Oily in some areas, dry in others | Targeted product placement |
| Sensitive | Redness, stinging, frequent irritation | Simplicity and fragrance-free formulas |
| Normal | Relatively balanced and comfortable | Maintenance and protection |
Skin type is not the same as a skin concern.
You can have oily skin and still feel dehydrated. You can have dry skin and experience breakouts. And you may also notice concerns such as uneven tone, fine lines, rough texture, puffiness, or loss of firmness.
That is why a good routine starts with observation rather than assumptions.
Consider What Is Happening Right Now
Skin changes.
Weather, sleep, stress, hormones, travel, medication, indoor heating, air-conditioning, and overuse of active ingredients can all affect how your face feels from one week to the next.
When your skin feels unusually reactive, simplify.
Pause aggressive exfoliation. Stop adding new products. Focus on cleansing, moisturizing, and sunscreen until your skin feels stable again.
That is not stepping backward. It is smart maintenance.
Products and Tools to Prepare
You do not need everything listed below. Start with the essentials, then add extras only when they serve a clear purpose.
Core Products
- Gentle cleanser
- Hydrating toner or essence
- One targeted serum
- Moisturizer
- Broad-spectrum sunscreen
- Optional facial oil
- Gentle exfoliant
- Optional face mask
Optional Tools
- Soft facial cloth
- Facial roller
- Gua sha tool
- Silicone cleansing device
- LED mask
- Microcurrent device
- Cooling tool
- Facial Massager
Clean tools matter more than expensive tools.
Wash reusable items before and after each use according to the manufacturer’s instructions. Keep them in a dry, clean place rather than loose in a bathroom drawer.
Step 1: Begin With Clean Hands and a Clean Setup
This step is easy to skip.
Do not skip it.
Wash your hands thoroughly before touching your face. Tie back your hair. Remove rings or bracelets that may drag across the skin. Set out a fresh towel and clean any tools you plan to use.
A routine designed to improve the skin should not begin by transferring old product residue, oil, or debris back onto it.
Preparation also helps you avoid fumbling halfway through the process while cleanser runs toward your collar.
Small detail. Big difference.
Step 2: Remove Makeup and Sunscreen
If you wear makeup, heavy sunscreen, or water-resistant products, a first cleanse can make the rest of the routine more effective.
Use an oil cleanser, cleansing balm, or makeup remover that suits your skin. Massage it gently over the face and allow it time to break down product buildup.
Do not scrub.
Around the eyes, press lightly and let the cleanser dissolve mascara or liner before wiping. Aggressive rubbing can irritate delicate skin and make the area look more tired, not less.
Double cleansing is useful, but it is not mandatory for everyone. If you wore minimal product and your cleanser removes everything comfortably, one thorough cleanse may be enough.
Step 3: Cleanse Properly
Cleansing is the foundation of every at-home facial routine.
Choose a formula that leaves the skin clean but not squeaky, tight, or stripped.
Cream cleansers often suit dry or sensitive skin. Gel cleansers may work well for combination or oily skin. Low-foaming, fragrance-free formulas are often easier for reactive complexions.
Use lukewarm water.
Very hot water can increase dryness and discomfort, while cold water does not magically close pores. Apply the cleanser with gentle circular motions, paying attention to the jawline, hairline, sides of the nose, and neck.
Rinse thoroughly and pat dry.
Do not rub the towel across the face.
Step 4: Exfoliate Carefully
Exfoliation can improve the appearance of dullness and rough texture by helping remove loose surface cells. It can also make makeup apply more smoothly.
But this is where many routines go wrong.
More exfoliation does not mean faster improvement. It often means redness, peeling, tightness, and a weakened skin barrier.
Physical vs. Chemical Exfoliation
Physical exfoliants use friction. Examples include scrubs, textured cloths, and brushes.
Chemical exfoliants use ingredients such as:
- Alpha hydroxy acids
- Beta hydroxy acids
- Polyhydroxy acids
- Fruit enzymes
For many people, a gentle chemical exfoliant is easier to control than a rough scrub. Still, strength and frequency matter.
Start once a week.
If your skin remains comfortable, you may increase gradually according to the product instructions. Avoid exfoliating irritated, sunburned, freshly treated, or visibly peeling skin.
Also avoid stacking treatments. A strong acid, retinoid, cleansing brush, and exfoliating mask do not belong in the same session.
Your skin is not a kitchen counter. It does not need to be scrubbed into submission.
Step 5: Apply a Hydrating Toner or Essence
A hydrating toner or essence can add lightweight moisture before thicker products.
Look for ingredients such as glycerin, panthenol, hyaluronic acid, aloe, or beta-glucan. Apply the product with clean hands and press it gently into the skin.
There is no need to soak a cotton pad unless the formula requires it.
This step is especially useful when the skin feels tight after cleansing or when you want serums and moisturizers to spread more smoothly.
Hydrated skin often looks plumper and more refined. That effect may be temporary, but it is still valuable, particularly when dryness exaggerates fine lines.
Step 6: Use One Targeted Serum
Serums are concentrated, so restraint matters.
Choose one based on your primary goal.
For Hydration
Look for:
- Hyaluronic acid
- Glycerin
- Panthenol
- Ceramides
- Beta-glucan
For Brighter-Looking Skin
Consider:
- Vitamin C
- Niacinamide
- Licorice-derived ingredients
- Other gentle brightening formulas
For Firmer-Looking Skin
Common options include:
- Peptides
- Retinoids
- Antioxidants
- Supportive hydrators
Do not layer several strong formulas simply because they each promise something different.
Too many active ingredients can create irritation that makes the skin look rougher, redder, and less even. Pick one priority. Give it time.
Patch testing is also worthwhile, especially with retinoids, acids, or fragranced products.
Step 7: Add a Gentle Facial Massage
This is where an at-home facial routine becomes more than product application.
Facial massage may help relax tension, temporarily reduce the appearance of puffiness, and make the skin feel refreshed. It also encourages slower, more mindful application.
The pressure should be light to moderate.
You are working with the skin, not against it.
Choose a Product With Slip
Never massage dry skin.
Use a facial oil, rich moisturizer, massage cream, or hydrating gel that allows your fingers to glide without pulling. The product should stay workable for several minutes.
A Simple Five-Minute Sequence
Neck and Collarbone
Begin near the collarbone with gentle sweeping motions. Move lightly along the sides of the neck.
Avoid pressing firmly over the front of the throat.
Jawline
Place your fingertips near the center of the chin and glide toward the ears. Repeat slowly.
This area often holds tension, especially in people who clench their jaw during work or sleep.
Cheeks
Move from the sides of the nose outward toward the ears. Use smooth, controlled motions.
Do not force the skin upward. Gentle movement is enough.
Under-Eye Area
Use your ring finger and very light pressure.
Tap or glide from the inner area outward, staying along the orbital bone rather than pressing close to the eye.
Forehead
Move from the brows toward the hairline, then from the center of the forehead toward the temples.
Slow circles around the temples can feel especially relaxing.
Avoid These Massage Mistakes
- Using too much pressure
- Massaging without enough slip
- Dragging the under-eye area
- Working over inflamed breakouts
- Using dirty tools
- Continuing after discomfort begins
- Assuming stronger pressure creates better results
Redness that fades quickly may happen after massage, but burning, stinging, or persistent irritation is a sign to stop.
Step 8: Explore Facial Toning
Facial toning is often marketed as a way to create a more lifted or defined appearance.
Keep expectations realistic.
Manual massage and facial exercises may temporarily improve the look of puffiness or tension, but they do not permanently change bone structure or erase the effects of aging.
Manual Toning Techniques
Gentle facial exercises, posture awareness, jaw relaxation, and controlled massage can all contribute to a more rested appearance.
Avoid exaggerated movements that feel uncomfortable or strain the face.
Subtle is better.
Microcurrent Devices
Microcurrent tools use low-level electrical currents and are commonly marketed for facial toning. Some users report a temporarily more lifted appearance with consistent use.
Technique matters.
Use the recommended conductive gel, follow the treatment map, begin at a low intensity, and never improvise around sensitive areas.
Microcurrent devices may not be suitable for everyone, including some people with implanted electronic medical devices, seizure disorders, pregnancy, broken skin, or recent cosmetic procedures.
Read the safety guidance carefully and seek professional advice when necessary.
Step 9: Use Modern Beauty Devices Wisely
Beauty technology can be useful. It can also become expensive clutter.
Choose devices based on a specific skin goal rather than novelty.
LED Face Masks
LED masks commonly use red, blue, or near-infrared light.
Different wavelengths are marketed for different concerns, including blemish-prone skin and smoother-looking texture. Quality varies widely, so consider wavelength information, treatment time, fit, safety instructions, and protective eyewear requirements.
Consistency matters more than occasional long sessions.
Follow the manufacturer’s schedule.
Sonic Cleansing Devices
These may improve cleansing efficiency, but they can be too much for sensitive skin when used frequently.
Do not combine a cleansing device with a scrub, peel, and exfoliating toner on the same day.
That is not thoroughness. It is overload.
Facial Rollers
A chilled roller may temporarily reduce the look of puffiness and help the skin feel refreshed.
Roll gently from the center of the face outward. Clean the tool before and after use.
Rollers can feel pleasant, but they do not permanently lift the face.
Gua Sha Tools
Gua sha can be incorporated into facial massage when used with sufficient slip.
Keep strokes slow and light. Pressing hard enough to leave bruising is unnecessary and may irritate the skin.
Avoid using the tool over active inflammation, open skin, or painful areas.
Heated and Cooling Tools
Cooling devices may soothe a warm or puffy-looking face. Heated tools may support relaxation or make certain products feel more comfortable.
Avoid extremes.
Excess heat can worsen redness, while intense cold may irritate sensitive skin. Follow the recommended temperature and treatment time.
Step 10: Apply a Face Mask
Face masks are optional, but they can make a weekly routine feel more restorative.
Choose the formula according to what your skin needs that day.
Hydrating Masks
Useful for dry, tight, or dull-looking skin.
Look for glycerin, hyaluronic acid, panthenol, aloe, or ceramides.
Clay Masks
Best for oily or congested areas.
You do not need to cover the entire face. Apply clay only where needed, such as the T-zone.
Do not let it dry until the skin feels painfully tight.
Sheet Masks
Convenient and easy to use.
They mainly provide temporary hydration, which can still be useful before an event or after travel.
Overnight Masks
These work like richer moisturizers and are often best used as the final evening step.
Avoid layering them over several heavy products if you are prone to congestion.
Once or twice a week is enough for many people.
Step 11: Seal in Moisture
Moisturizer helps reduce water loss and supports the skin barrier.
It also improves softness and may make fine lines caused by dehydration look less noticeable.
Choose the texture based on your skin and climate:
- Gel for oily skin or humid weather
- Lotion for combination skin
- Cream for dry or mature skin
- Balm for extremely dry areas
Helpful ingredients include ceramides, squalane, fatty acids, glycerin, panthenol, and shea butter.
Apply moisturizer while the skin is still slightly hydrated from previous steps.
You do not need a thick layer. Enough to cover the face comfortably is usually sufficient.
Step 12: Add Facial Oil Only When Needed
Facial oil is optional.
It may be useful for dry skin, cold weather, or facial massage, but it does not replace water-based hydration.
Use two or three drops after moisturizer to help seal in moisture. Applying too much can leave the skin greasy without improving hydration.
Lighter oils may suit combination skin, while richer oils may feel better on dry or mature skin.
Pay attention to how your skin responds.
Step 13: Finish With Sunscreen in the Morning
No anti-aging at-home facial routine is complete without sunscreen.
Daily ultraviolet exposure contributes to uneven pigmentation, rough texture, fine lines, and reduced elasticity. Skincare products may support the appearance of the skin, but sunscreen helps protect the progress you are trying to make.
Use a broad-spectrum formula and apply it to:
- Face
- Ears
- Neck
- Exposed upper chest
Reapply during extended outdoor exposure, especially after sweating or wiping the face.
This step matters more than the latest serum.
Really.
A Simple Morning Routine
| Step | Product or Technique | Purpose |
|---|---|---|
| 1 | Gentle cleanser | Remove overnight oil and residue |
| 2 | Hydrating toner | Add lightweight moisture |
| 3 | Antioxidant or hydrating serum | Support brightness and hydration |
| 4 | Brief facial massage | Ease tension and temporary puffiness |
| 5 | Moisturizer | Support the skin barrier |
| 6 | Sunscreen | Protect against ultraviolet exposure |
Keep the morning routine efficient.
Too many layers can cause sunscreen or makeup to pill. Allow each product to settle for a moment before applying the next.
A Practical Evening Routine
| Step | Product or Technique | Purpose |
|---|---|---|
| 1 | Makeup remover or balm | Dissolve makeup and sunscreen |
| 2 | Gentle cleanser | Remove remaining residue |
| 3 | Exfoliant on selected nights | Improve surface texture |
| 4 | Toner or essence | Restore hydration |
| 5 | Serum or treatment | Address one concern |
| 6 | Massage or beauty device | Support relaxation or toning |
| 7 | Moisturizer | Reduce moisture loss |
| 8 | Facial oil or overnight mask | Add optional nourishment |
Not every step belongs every night.
Rotate exfoliation, facial devices, and richer masks. Build recovery nights into your routine using only cleanser, hydrating serum, and moisturizer.
Your skin needs quiet days too.
A Weekly At-Home Facial Schedule
A weekly plan makes it easier to avoid using everything at once.
| Day | Suggested Focus |
|---|---|
| Monday | Basic hydration |
| Tuesday | Facial massage |
| Wednesday | Beauty-device session |
| Thursday | Barrier-support routine |
| Friday | Gentle exfoliation |
| Saturday | Hydrating mask and massage |
| Sunday | Minimal recovery routine |
This is only a template.
Sensitive skin may need fewer treatments. Oilier skin may prefer lighter products. Mature skin may benefit from more frequent barrier support.
Customize the routine instead of forcing your face to follow a calendar.
How Often Should You Do a Full Facial?
A complete at-home facial routine can be done once a week.
The essentials remain daily:
- Cleansing
- Moisturizing
- Sunscreen
- Appropriate treatment products
Facial massage may be done several times a week if the skin stays comfortable. Exfoliation should be limited based on product strength. Beauty-device use should always follow the manufacturer’s instructions.
More frequent does not always mean more effective.
Skin improves through consistency, not punishment.
Signs You Are Doing Too Much
Pay attention to warning signs.
These may include:
- Persistent redness
- Burning
- Stinging
- Peeling
- Sudden dryness
- Increased sensitivity
- Tightness
- Worsening breakouts
- Products that suddenly sting
When this happens, simplify immediately.
Stop exfoliation and strong active ingredients. Use a mild cleanser, basic moisturizer, and sunscreen until the skin feels comfortable again.
An overloaded at-home facial routine can delay progress by disrupting the very barrier you are trying to support.
Support Skin Rejuvenation Beyond Products
Skincare matters, but it is not the only factor affecting how your face looks.
Sleep Consistently
Poor sleep can make the complexion appear dull and the eye area look more tired.
A steady sleep schedule may support a more rested appearance.
Stay Hydrated
Drinking enough water supports general wellness, but it does not replace moisturizer.
Think of internal hydration and topical hydration as partners, not substitutes.
Eat a Balanced Diet
Prioritize variety.
Protein, fruits, vegetables, whole grains, and healthy fats all contribute to overall health. No single food can reverse aging or instantly transform the skin.
Manage Stress
Stress often shows up through jaw clenching, forehead tension, poor sleep, and rushed routines.
Walking, stretching, breathing exercises, journaling, or a slow facial massage can help create a calmer evening ritual.
Protect the Skin From the Environment
Use sunscreen. Cleanse after heavy pollution exposure. Add a humidifier during very dry seasons. Switch to a richer moisturizer in cold weather.
Adjustments do not need to be dramatic to be effective.
Common Mistakes to Avoid
Even a carefully planned routine can become counterproductive when certain habits creep in.
Avoid:
- Using multiple strong active ingredients at once
- Exfoliating every day
- Skipping sunscreen
- Applying products in a random order
- Using dirty tools
- Pressing too hard during massage
- Expecting permanent lifting from temporary treatments
- Changing products every few days
- Ignoring irritation
- Copying a routine designed for a different skin type
- Buying devices without reviewing contraindications
A simple routine performed consistently will usually serve you better than an elaborate routine performed unpredictably.
How Long Does It Take to See Results?
Some effects appear quickly.
Hydrated skin may look plumper within hours. Cooling and massage may temporarily reduce puffiness. A face mask may leave the surface softer for the rest of the day.
Longer-term improvements take time.
Texture, tone, fine lines, and firmness may require several weeks or months of consistent care. Results depend on age, skin type, sun exposure, product selection, device quality, lifestyle, and routine frequency.
Take progress photos once a month in the same lighting.
Daily mirror checks are unreliable. Lighting changes. Sleep changes. Your mood changes.
Monthly comparison gives you a clearer picture.
How to Keep the Routine Affordable
You do not need luxury packaging.
Start with:
- A gentle cleanser
- One serum
- A moisturizer
- Sunscreen
That is enough to build a strong foundation.
Add a facial tool or beauty device only when you understand what it is meant to do and how often you will realistically use it. Avoid buying several devices that target the same concern.
Calculate cost per use.
A moderately priced tool used three times a week may offer better value than an expensive device used twice and forgotten in a drawer.
The best at-home facial routine is not the most expensive one. It is the one you can repeat comfortably.
When to Seek Professional Advice
Home care has limits.
Speak with a qualified professional when you experience:
- Persistent acne
- Sudden or severe skin changes
- Painful irritation
- Unexplained rashes
- Ongoing sensitivity
- Suspicious moles or lesions
- Reactions that do not improve
- Questions about device safety
- Recent injectable, laser, peel, or surgical treatments
Professional guidance is especially important when active skin conditions or medical concerns are involved.
An at-home routine should support your skin, not replace diagnosis or treatment.
Build a Routine You Will Actually Follow
Smoother, firmer-looking skin rarely comes from one dramatic product or a single elaborate treatment.
It comes from the basics.
Cleanse gently. Hydrate well. Massage carefully. Use facial-toning methods with realistic expectations. Introduce modern beauty devices slowly. Moisturize consistently. Protect your skin from the sun.
Then repeat.
A successful at-home facial routine should feel structured but not rigid, effective but not aggressive, and enjoyable enough that you look forward to doing it.
Start small. Pay attention. Adjust when necessary.
Your skin does not need perfection.
It needs patience, protection, and consistent care.