There’s something instantly uplifting about Disney nail art designs. One glance, and you’re transported back to childhood movies, favorite characters, and moments that felt bigger than life. Now imagine carrying that magic with you, right at your fingertips. That’s the power of nail art when it meets Disney.
I’ve seen it firsthand. A simple set of nails can turn into a conversation starter, a confidence boost, or even a tiny piece of storytelling. And the best part? You don’t need to be a professional artist to make it work. With the right ideas, tools, and a little patience, you can create stunning Disney nail art designs that feel uniquely yours.
Why Disney Nail Art Designs Never Go Out of Style
Disney isn’t just entertainment it’s emotion. That emotional connection is what makes Disney nail art designs so popular across all age groups.
Think about it.
A Mickey silhouette? Instantly recognizable.
A Cinderella blue shimmer? Elegant and timeless.
A splash of Ariel-inspired teal? Fresh and bold.
Here’s why these designs keep trending:
- Nostalgia meets creativity – You’re not just painting nails; you’re expressing memories
- Endless variety – From minimal icons to full character art
- Universal appeal – Kids love it, adults refine it
- Social media boost – Eye-catching designs perform well online
In fact, the way trends evolve and spread across platforms can sometimes feel similar to complex systems studied in fields like Nonlinear dynamics, where small changes can lead to massive visual impact.
Tools You’ll Need to Get Started
Before jumping into designs, let’s talk setup. If you’ve ever searched for a beginner nail art tools and supplies guide, you already know that having the right tools makes everything easier and cleaner.
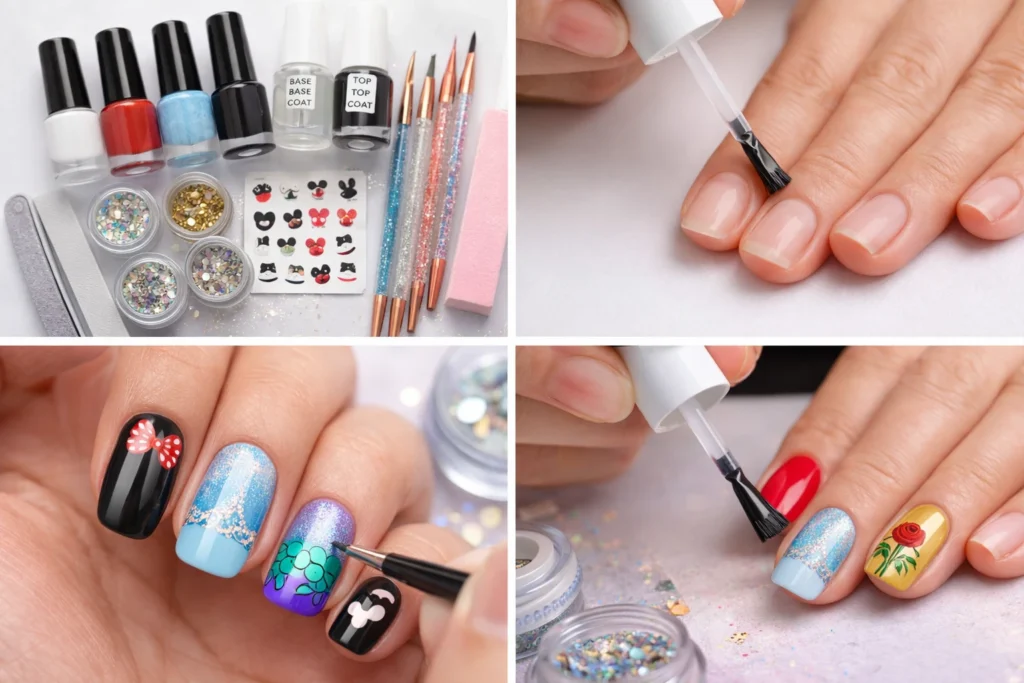
Essential Nail Art Kit
| Tool | Purpose |
| Nail file & buffer | Shape and smooth nails |
| Base coat | Protect natural nails |
| Nail polish (gel or regular) | Color foundation |
| Fine nail art brushes | Detailed designs |
| Dotting tools | Perfect circles (hello Mickey!) |
| Nail stickers/decals | Quick designs |
| Top coat | Seal and protect |
If you’re unsure about formulas, understanding the difference between gel polish and regular nail polish can help you choose what works best for your lifestyle and durability needs.
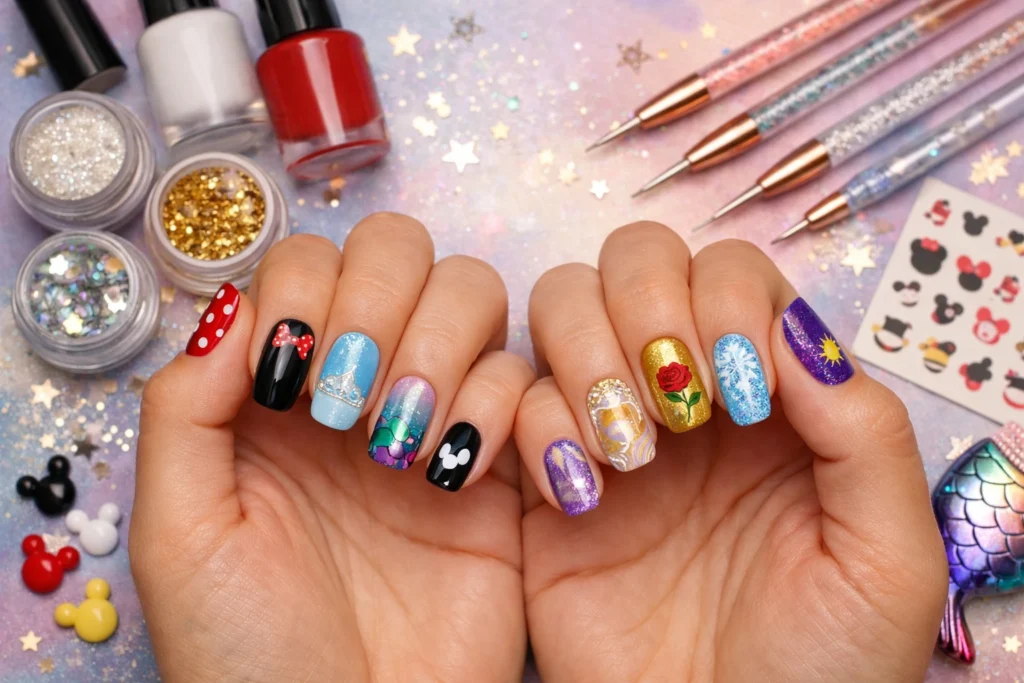
Classic Disney Nail Art Designs That Always Work
Let’s start with the icons. These are the designs that never fail.
Mickey and Minnie Mouse Nails
Simple. Recognizable. Always cute.
- Use black polish for Mickey silhouettes
- Add red with white dots for Minnie vibes
- Try accent nails instead of full sets for balance
This is one of the easiest Disney nail art designs to recreate and one of the most effective.
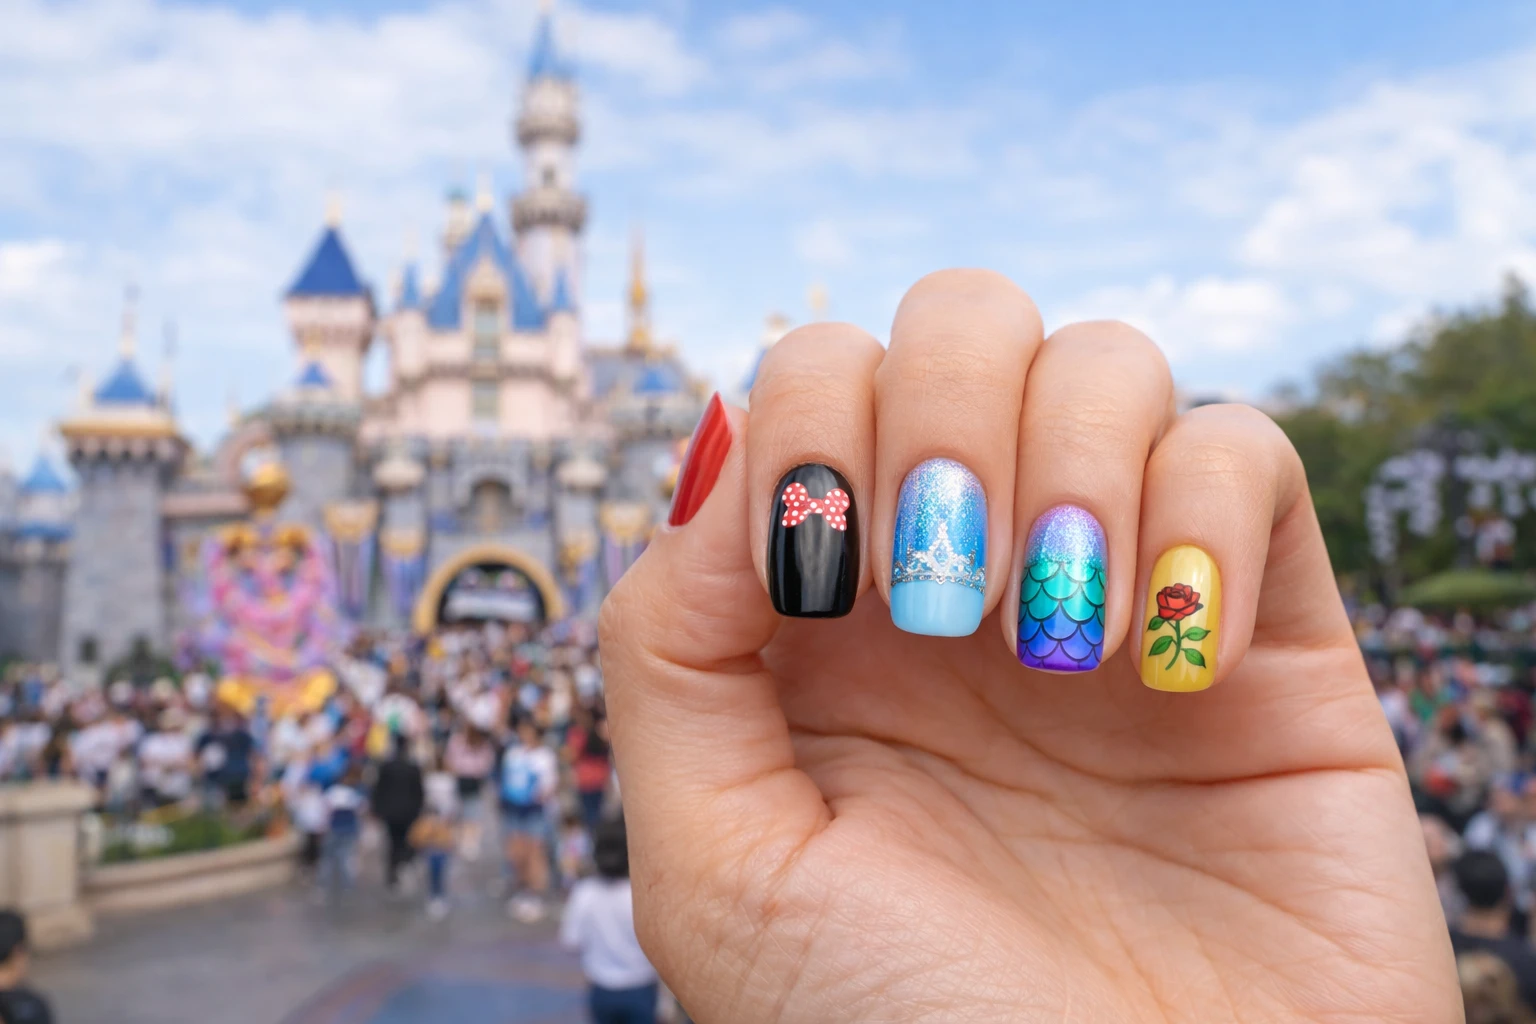
Disney Princess-Inspired Nails
This is where elegance meets fantasy.
Popular ideas:
- Cinderella: Soft blue with glitter gradients
- Ariel: Teal scales with shimmer
- Belle: Gold tones with rose accents
If you’re exploring how to choose nail colors that match your outfit, these princess palettes are a great place to start.
Toy Story Nail Art
Playful and colorful.
- Cloud patterns (Andy’s room vibe)
- Cow print for Woody
- Neon accents for Buzz Lightyear
Modern Disney Nail Art Designs That Feel Fresh
If classic isn’t your style, modern trends open up new possibilities.
Minimalist Disney Nails
Less detail. More impact.
- Tiny Mickey heads on nude nails
- Subtle character outlines
- Single accent nail designs
If you’re learning how to create minimalist nail designs at home, this style is perfect for building confidence.
Ombre and Gradient Styles
Blend colors inspired by characters:
- Pink to purple for Rapunzel
- Blue to white for Frozen themes
- Sunset gradients for Moana
Interestingly, the blending of colors in gradients can be compared to principles seen in Fourier transform, where complex visuals are built from simpler components.
Disney Nail Art Designs for Every Occasion
These designs aren’t just for fun they can match your life moments too.
For Holidays
- Christmas: Mickey in Santa hats
- Halloween: Disney villains
For Disney Trips
Planning a park visit? Your nails should match the energy.
- Match colors to your outfits
- Use park icons
- Choose durable options
If you’re weighing options, a quick DIY vs salon nail art cost comparison can help you decide which route fits your budget and expectations.
Easy Disney Nail Art Designs for Beginners
Let’s keep it real. Not everyone can paint detailed characters and that’s okay. If you’re looking for easy nail art ideas for beginners step by step, start simple:
- Mickey dots (three circles done!)
- Color-blocked themes
- Stickers or decals
Also, learning basic nail art mistakes to avoid for beginners like rushing layers or overloading designs can save you a lot of frustration.
Advanced Disney Nail Art Techniques
Ready to level up?
Techniques to Try:
- Hand-painted characters
- 3D nail art
- Encapsulated glitter
These methods often require patience, but they fall under the best nail art techniques for detailed designs if you want standout results.
Choosing the Right Colors for Disney Nail Art Designs
Color matters. A lot.
Quick Color Guide
| Character | Suggested Colors |
| Mickey | Red, black, white |
| Ariel | Teal, purple |
| Belle | Gold, yellow |
| Elsa | Ice blue, silver |
If you’re still unsure, revisit guides on how to choose nail colors that match your outfit to keep your look cohesive.
How to Make Your Disney Nail Art Last Longer
You’ve put in the effort now protect it. If you’ve ever wondered how to make nail art last longer at home, these tips will help:
- Clean nails before applying polish
- Use thin layers
- Seal with a strong top coat
For ongoing care, follow tips for maintaining manicure for longer wear like avoiding harsh chemicals and reapplying top coat every few days.
DIY vs Salon: What’s the Better Choice?
Both options work. It depends on your goals. A quick DIY vs salon nail art cost comparison shows that DIY saves money, while salons offer precision and complex designs.
Choose based on:
- Budget
- Skill level
- Time availability
Where to Find Inspiration
Creativity doesn’t happen in a vacuum.
Look for:
- Instagram nail artists
- Pinterest boards
- Tutorials
Then adapt ideas into your own version of Disney nail art designs.
How to Create Your Own Unique Disney Nail Art Designs
This is where things get personal.
Try This:
- Pick a theme
- Choose 2–3 colors
- Add one standout element
Avoid common pitfalls by remembering key nail art mistakes to avoid for beginners, like overcrowding or skipping prep.
Final Thoughts
There’s a reason Disney nail art designs continue to captivate nail lovers everywhere. They’re playful, expressive, and endlessly customizable. You’re not just painting nails you’re telling a story.
With the right tools, a bit of creativity, and a few smart techniques, your next set of Disney nail art designs can feel like a tiny masterpiece. So go ahead. Start small. Experiment often. And most importantly have fun creating your own magic!
FAQs
They typically last 5–14 days depending on whether you use regular polish or gel and how well you maintain them.
Yes, many designs like Mickey dots or decals are beginner-friendly and easy to recreate at home.
Basic tools include nail polish, brushes, dotting tools, and a top coat for sealing your design.
Absolutely, using stickers, press-ons, or simple patterns makes it accessible for anyone.
Gel polish lasts longer and resists chipping better, making it ideal for detailed or long-lasting designs.
Pick a design that matches your style, skill level, and the occasion you’re preparing for.
Not if applied and removed properly; damage usually comes from improper removal techniques.
Simple silhouettes, polka dots, or accent nails are the easiest for beginners.
Use thin layers, clean edges, and always finish with a high-quality top coat.
Yes, you can mix characters, colors, and styles to create a design that’s uniquely yours.